Powered by Blogger.

Decorating for a New Year's Eve Party – Part Two

There are plenty of banners available at party stores that you could hang near the entry way of your home or even outside the front door. You can make a banner too, if you are the artistic type. A metallic banner can match a more sophisticated theme. If you are having a party where there will be lots of kids, consider having them make the banner as well as the noise makers. All they will need to make a fun banner is a large piece of construction paper, stencils, and markers.

Centerpieces on the tables are a nice touch that can really make your decorating stand out. There is no need to buy one already put together, because there are plenty of ways you can put together a cheap centerpiece yourself that will look great. Floating candles shaped like flower blossoms in glass bowls can look great, just add some glass rocks to the bottom of the bowl in a color that matches your theme. You could also just use a simple bouquet of flowers as a centerpiece in colors that match your theme. Or, place several pillar candles on a pretty plate and fill the gaps in the plate with small clear Christmas ornaments with the hooks removed. The idea is that the clear ornaments will look like bubbles. You can vary this idea by using champagne bottles in place of the candles, or you can mix the two up.


This blog is brought to you by nursing jobs.
read more "Decorating for a New Year's Eve Party – Part Two"

Decorating for a New Year's Eve Party – Part Two

There are plenty of banners available at party stores that you could hang near the entry way of your home or even outside the front door. You can make a banner too, if you are the artistic type. A metallic banner can match a more sophisticated theme. If you are having a party where there will be lots of kids, consider having them make the banner as well as the noise makers. All they will need to make a fun banner is a large piece of construction paper, stencils, and markers.

Centerpieces on the tables are a nice touch that can really make your decorating stand out. There is no need to buy one already put together, because there are plenty of ways you can put together a cheap centerpiece yourself that will look great. Floating candles shaped like flower blossoms in glass bowls can look great, just add some glass rocks to the bottom of the bowl in a color that matches your theme. You could also just use a simple bouquet of flowers as a centerpiece in colors that match your theme. Or, place several pillar candles on a pretty plate and fill the gaps in the plate with small clear Christmas ornaments with the hooks removed. The idea is that the clear ornaments will look like bubbles. You can vary this idea by using champagne bottles in place of the candles, or you can mix the two up.


This blog is brought to you by nursing jobs.
read more "Decorating for a New Year's Eve Party – Part Two"

Year in review

Well chickees...this is my 99th post! Holy crap, I'm not kidding. Interesting, because I started this blog in May, and only had about 20 posts in my first four months. Shows you how into this bloggy stuff I got in about...September or so? For my 100th post I have a very cute (but small) giveaway to give to one of you. Can't wait to show you. It's not really a big deal, just fun. :)What's with me
read more "Year in review"

Decorating for a New Year's Eve Party – Part One

Hosting a New Year's Eve party often includes decorating for the night. Decorating doesn't have to be a huge deal, there are several ways you can decorate easily and quickly without having to spend too much money.

First you should pick a theme to go with. Many New Year's Eve parties are adults only, in which case you may want to choose a different theme than if the party is going to be a neighborhood party including children. Fun hats and noisemakers are pretty much a must for either type of party, since kids and adults both get a kick out of these items.
However, especially if you are going to have a lot of kids at your party, you might not want to hand out the noise makers until a few minutes before midnight unless you don't mind all of the racket kids will make with them. Another option if there are going to be lots of children at your party is to recruit them to make the noisemakers as a craft. Have them fill coffee cans with uncooked rice or change. Then they can cover the coffee cans with construction paper with designs drawn on. Hats you should hand out right away. Masks can add a sophisticated air to your party.

Balloons are a cheap way to add some color to your decorating. You can always find balloons in colors that will match your theme. Silver balloons will look classier, colorful balloons will look good for a neighborhood party.

Check back tomorrow for part two of this blog.

This blog is brought to you by rehab jobs.
read more "Decorating for a New Year's Eve Party – Part One"

Decorating for a New Year's Eve Party – Part One

Hosting a New Year's Eve party often includes decorating for the night. Decorating doesn't have to be a huge deal, there are several ways you can decorate easily and quickly without having to spend too much money.

First you should pick a theme to go with. Many New Year's Eve parties are adults only, in which case you may want to choose a different theme than if the party is going to be a neighborhood party including children. Fun hats and noisemakers are pretty much a must for either type of party, since kids and adults both get a kick out of these items.
However, especially if you are going to have a lot of kids at your party, you might not want to hand out the noise makers until a few minutes before midnight unless you don't mind all of the racket kids will make with them. Another option if there are going to be lots of children at your party is to recruit them to make the noisemakers as a craft. Have them fill coffee cans with uncooked rice or change. Then they can cover the coffee cans with construction paper with designs drawn on. Hats you should hand out right away. Masks can add a sophisticated air to your party.

Balloons are a cheap way to add some color to your decorating. You can always find balloons in colors that will match your theme. Silver balloons will look classier, colorful balloons will look good for a neighborhood party.

Check back tomorrow for part two of this blog.

This blog is brought to you by rehab jobs.
read more "Decorating for a New Year's Eve Party – Part One"

Cheap gift tags (FREE!)

First of all, thanks for your kind words about my last post. I appreciate hearing from all of you and to know I'm not the only one who feels that way sometimes. I know it is a GOOD thing to be so grateful, but I should try not to worry so much too. :)So I have seen this idea a couple times in blogland and the first time I saw it, I knew this easy peasy project was just for me. Do you keep your
read more "Cheap gift tags (FREE!)"

Are you ever waiting?

For the other "shoe" to drop?I can't tell you how many times a week I have this exact thought in my head. Tonight I thought it again.How is it possible I could be SO blessed? So lucky? So fortunate? I have a home I love. Friends that are always there when I need them and a family that loves me and puts up with me no matter what. Most of all: a beautiful, sweet stepdaughter, my incredibly patient
read more "Are you ever waiting?"

The Aftermath

First of all, YES! the tree is still standing!! Yahoo!! I usually leave it up through New Year's but wanted to take it down early this year. It is stressing me out. But Hubby thinks it will be fine so up it stays. I really do love it...as long as it stays put. :)Secondly, before I show you how Christmas blew up in our house, check out the GORG wreath I got today at Tar-jay! My girlfriend bought
read more "The Aftermath"

Last Minute Christmas Decorations – Part Two

Greeting cards are something that you already have on hand that can easily be used for decorating. You can even use cards from past holiday seasons if you don’t have enough for decorating from this season. Display them on your mantle among sprigs of greenery. Use a hole punch in the corner of each card and string them along a wall.

Gifts that are already wrapped make great decorations. Spend a little extra time wrapping your gifts nicely, and you can use them for decorating also. Make sure to use bows and ribbon if you want to go the extra mile. Place some gifts under the tree as usual, but display others around the house in different places too.


Stack a couple of gifts on an end table, or place a few along your mantle. Place a stack of gifts near your entry way or place a few above your kitchen cabinets.

If you like the idea of decorating with gifts, but don’t have enough around, you can always wrap a few empty boxes. If you want to diversify the theme a little more, you can wrap ribbon around your throw pillows and place a bow in the center to make your pillows look like gifts.

Place a few candy canes in a simple clear glass cup or a small vase. Tie small red ribbons around the necks of the candy canes and display them on your mantle or end table.

This blog is brought to you by occupational therapy jobs.
read more "Last Minute Christmas Decorations – Part Two"

Last Minute Christmas Decorations – Part Two

Greeting cards are something that you already have on hand that can easily be used for decorating. You can even use cards from past holiday seasons if you don’t have enough for decorating from this season. Display them on your mantle among sprigs of greenery. Use a hole punch in the corner of each card and string them along a wall.

Gifts that are already wrapped make great decorations. Spend a little extra time wrapping your gifts nicely, and you can use them for decorating also. Make sure to use bows and ribbon if you want to go the extra mile. Place some gifts under the tree as usual, but display others around the house in different places too.


Stack a couple of gifts on an end table, or place a few along your mantle. Place a stack of gifts near your entry way or place a few above your kitchen cabinets.

If you like the idea of decorating with gifts, but don’t have enough around, you can always wrap a few empty boxes. If you want to diversify the theme a little more, you can wrap ribbon around your throw pillows and place a bow in the center to make your pillows look like gifts.

Place a few candy canes in a simple clear glass cup or a small vase. Tie small red ribbons around the necks of the candy canes and display them on your mantle or end table.

This blog is brought to you by occupational therapy jobs.
read more "Last Minute Christmas Decorations – Part Two"

The tree that would not STAND UP.

I figured you wouldn't believe it if I didn't show you...Notice anything different??No?? How about now?:No, I'm not kidding, this tree is falling over again. I noticed it while I lounged on the couch out there the other night. Yeah...relaxing...imagine that. Later that night, I kind of wiggled it and it ALMOST FELL OVER AGAIN. Hubby was asleep, Sister was asleep, so there I was with my drill and
read more "The tree that would not STAND UP."

Last Minute Christmas Decorations – Part One

There isn’t very much time to finish decorating for Christmas. If you are hosting a Christmas get together at your house, you may want to do some speedy and cheap decorating. Never fear, there are several things you could do very quickly.

For Christmas dinner if you don’t have any Christmas plates or settings, you can use plain white plates. Use a red or white tablecloth, or use red or white place mats. Then, place one round glass ornament on each plate. This looks classier if you use just one color for all of the ornaments, and it looks more fun and happy if you use several colors. You can even use a variety of ornament types for a more sentimental look. If you want to get more elaborate, you can use small ornaments along with the large ornaments and even add seasonal greenery or colored tinsel.
Next, place a glass or silver pedestal cake stand in the center of the table and fill it with ornaments that match the ornaments you have on the plates.

If you want a more fancy centerpiece for your kitchen table, try placing cream or white colored pillar candles and tapered candles in a ceramic or metal bowl. Fill the spaces between them in the bottom half of the bowl with newspaper. On top of the newspaper place shiny ornaments in the bowl until it is overflowing with them. Silver ornaments and beads look really nice. Then, right when your guests sit down to dinner you can light the candles. Just make sure to blow them out when you’re done, since this display of candles might not be totally steady.
Check back soon for part two of this blog.

This blog is brought to you by nephrology jobs.
read more "Last Minute Christmas Decorations – Part One"

Last Minute Christmas Decorations – Part One

There isn’t very much time to finish decorating for Christmas. If you are hosting a Christmas get together at your house, you may want to do some speedy and cheap decorating. Never fear, there are several things you could do very quickly.

For Christmas dinner if you don’t have any Christmas plates or settings, you can use plain white plates. Use a red or white tablecloth, or use red or white place mats. Then, place one round glass ornament on each plate. This looks classier if you use just one color for all of the ornaments, and it looks more fun and happy if you use several colors. You can even use a variety of ornament types for a more sentimental look. If you want to get more elaborate, you can use small ornaments along with the large ornaments and even add seasonal greenery or colored tinsel.
Next, place a glass or silver pedestal cake stand in the center of the table and fill it with ornaments that match the ornaments you have on the plates.

If you want a more fancy centerpiece for your kitchen table, try placing cream or white colored pillar candles and tapered candles in a ceramic or metal bowl. Fill the spaces between them in the bottom half of the bowl with newspaper. On top of the newspaper place shiny ornaments in the bowl until it is overflowing with them. Silver ornaments and beads look really nice. Then, right when your guests sit down to dinner you can light the candles. Just make sure to blow them out when you’re done, since this display of candles might not be totally steady.
Check back soon for part two of this blog.

This blog is brought to you by nephrology jobs.
read more "Last Minute Christmas Decorations – Part One"

Make your home glow with Christmas

I'm running out of time to show you some fun stuff, so this post will be a slew of pictures, bam, bam BAM!!! Ahhhhh!!First of all, I had to show you another Goodwill project. (Don't worry, I still have MORE.) I got these little square boards for .49 each, got the letters on sale, had the paper and glitter, so this was waaaay less than $10. I. LOVE. IT. So here we go, a tour of our home and the
read more "Make your home glow with Christmas"

Fun. Easy. Cheap Christmas decor.

I know, I should say inexpensive...not cheap. Cheap sounds so...well...CHEAP. I have seen SO many creative, inexpensive, beautiful Christmas decorating ideas around blogland recently and just had to share them with you! I love them all!! Go check these ladies out for more info on all of these goodies. (I linked to the post where these can be found.)Using ribbon to decorate for the holidays from
read more "Fun. Easy. Cheap Christmas decor."

Pfeffer HUH and I need HOW many cookies??

WARNING: You will want cookies after reading this. Don't say I didn't warn you.So my other new BFF, Lori, posted at the Favorite Things party about their love of pfeffernuesse cookies. HUH? What the? I had never heard of these things, but I was intrigued to say the least. They have spices in them, as well as peppermint, but they are cookies? I say it again...HUH? I guess you love them or hate
read more "Pfeffer HUH and I need HOW many cookies??"

Goodwill is my BFF

Keep joining the Christmas Tree Party here! If I haven't visited you yet, I will!So I visit Goodwill (at various locations) more times a week than my best friend's houses. You know how they say you know a good friend when you can open their fridge and get what you want out without asking? Well, if Goodwill had a fridge, I'd be opening it to grab a Pepsi.We are TIGHT.I had to show you what I've
read more "Goodwill is my BFF"

Decorate for the Holidays Inexpensively - Part Two

Tea light candles are extremely cheap. You can find them at dollar stores easily most of the time. Use tea light candles in clean glass jars. The jars can even be recycled jars that your food items came in, such as applesauce jars or mayonnaise jars. Tie a red, silver, green, or sparkly ribbon around the neck of the jar. Group a few of these candles together on end tables or a mantle for an easy, pretty decoration.

Try looking at thrift stores or discount stores for teddy bears or other holiday animals. Put them through the wash, and most of them will look brand new. When they're dry, tie colorful ribbons around their necks. Next, collect various sizes of boxes from shoebox size down. Wrap them in colorful wrapping paper and tie pretty bows around them. Display these present boxes with the teddy bears for an adorable decorating scheme. Try gluing a box under a bear's arm, or have a bear sitting on a present.

Hang a few ornaments or a few strands of tinsel from a chandelier. You can add a few pieces of greenery too, tied on with ribbon.

Use acrylic paint and some seasonally shaped sponges that you can find in a craft store to decorate your windows. Colors like white, red, green, gold, or silver look very festive. This can be a fun project that kids might like to participate in too.

Christmas tree ornaments can be used in places other than just your tree. Try picking out several ornaments that are the same color and putting them in a small decorative bowl on your mantle or on an end table.

This blog is brought to you by physical therapy jobs.
read more "Decorate for the Holidays Inexpensively - Part Two"

Decorate for the Holidays Inexpensively - Part Two

Tea light candles are extremely cheap. You can find them at dollar stores easily most of the time. Use tea light candles in clean glass jars. The jars can even be recycled jars that your food items came in, such as applesauce jars or mayonnaise jars. Tie a red, silver, green, or sparkly ribbon around the neck of the jar. Group a few of these candles together on end tables or a mantle for an easy, pretty decoration.

Try looking at thrift stores or discount stores for teddy bears or other holiday animals. Put them through the wash, and most of them will look brand new. When they're dry, tie colorful ribbons around their necks. Next, collect various sizes of boxes from shoebox size down. Wrap them in colorful wrapping paper and tie pretty bows around them. Display these present boxes with the teddy bears for an adorable decorating scheme. Try gluing a box under a bear's arm, or have a bear sitting on a present.

Hang a few ornaments or a few strands of tinsel from a chandelier. You can add a few pieces of greenery too, tied on with ribbon.

Use acrylic paint and some seasonally shaped sponges that you can find in a craft store to decorate your windows. Colors like white, red, green, gold, or silver look very festive. This can be a fun project that kids might like to participate in too.

Christmas tree ornaments can be used in places other than just your tree. Try picking out several ornaments that are the same color and putting them in a small decorative bowl on your mantle or on an end table.

This blog is brought to you by physical therapy jobs.
read more "Decorate for the Holidays Inexpensively - Part Two"

Decorate for the Holidays Inexpensively - Part One

Many people do not have a lot in their budget for holiday decorating this year. But, you would be surprised how many nice decorations you can create very inexpensively. You may not end up needing to buy any full priced decorations.

Before you buy any decorations or any materials for the following ideas, or spend any time making any of these decorations, take the time to plan out your decorating theme. This can save you time and money that you might spend experimenting, so it makes sense to plan. Some people like to decorate with a more classy looking theme, consisting of a lot of white, clear, silver and shimmery decorations. Some people may find this boring and opt to decorate using more vibrant colors in a toy land theme for example. Some people like to go with a more subtle cabin or ski lodge decoration scheme that will look warm and cozy.

Use what you can for free from your back yard. Trim small branches from pine trees and gather pine cones and holly. These can all be used to make a centerpiece, or to decorate a mantle. Pine cones can be spray painted with gold, silver, or sparkley paint.
Pine tree branches can be used as an accent to almost any decoration, and they smell nice too, so be liberal when you are gathering them. If you have bird houses in your back yard that are going to waste during the cold months, bring them inside. Wash them off, and tie ribbons around them. Add a couple small pine branches, and you have a beautiful hanging decoration.

Check back soon for part two of this blog.

This blog is brought to you by physician staffing.
read more "Decorate for the Holidays Inexpensively - Part One"

Decorate for the Holidays Inexpensively - Part One

Many people do not have a lot in their budget for holiday decorating this year. But, you would be surprised how many nice decorations you can create very inexpensively. You may not end up needing to buy any full priced decorations.

Before you buy any decorations or any materials for the following ideas, or spend any time making any of these decorations, take the time to plan out your decorating theme. This can save you time and money that you might spend experimenting, so it makes sense to plan. Some people like to decorate with a more classy looking theme, consisting of a lot of white, clear, silver and shimmery decorations. Some people may find this boring and opt to decorate using more vibrant colors in a toy land theme for example. Some people like to go with a more subtle cabin or ski lodge decoration scheme that will look warm and cozy.

Use what you can for free from your back yard. Trim small branches from pine trees and gather pine cones and holly. These can all be used to make a centerpiece, or to decorate a mantle. Pine cones can be spray painted with gold, silver, or sparkley paint.
Pine tree branches can be used as an accent to almost any decoration, and they smell nice too, so be liberal when you are gathering them. If you have bird houses in your back yard that are going to waste during the cold months, bring them inside. Wash them off, and tie ribbons around them. Add a couple small pine branches, and you have a beautiful hanging decoration.

Check back soon for part two of this blog.

This blog is brought to you by physician staffing.
read more "Decorate for the Holidays Inexpensively - Part One"

It's a Christmas tree par-tay!

Whew, what a weekend! A Disney show, two holiday parties plus a birthday party for a two-year-old that was a hit. Do any of you have children born in December? It's tough...wouldn't change it for the world, but talk about adding one more thing to your list this time of year! Although with each year, I enjoy having the party this time of year more and more.I know I'm not the only one in blogland
read more "It's a Christmas tree par-tay!"

Quickly Ready your Home for Guests

Getting your home ready for guests can turn into a big ordeal. Here are a few bare essentials you can take care of quickly that will make your home look plenty ready for guests during the holidays.

First, go outside and look at what your guests will see as they walk to your front door. If there are any ice patches to spread salt on or snow to be shoveled take care of that first. Maybe the front house light is burned out and in need of replacement. Set a couple of planters out front with Christmas plants in them such as poinsettias. Big red bows around your porch railing can look very festive and are quick and easy to tie.

Now, open the front door and check out the view. Often we have our favorite jackets, snow hats, and mittens hung over railings or on the counter tops. Gather these things up and put them away for now. You can easily get them all out again as soon as your company is gone.

Clear out a few coats from the coat closet so guests can hang their coats in it. Make room on the floor of your coat closet for guests to keep their shoes. This is especially handy if you have a dog who eats guests' shoes like I do.

Make sure there are plenty of chairs available for guests to sit in. Make sure your couches don't have excessive pillows decorating them that don't leave enough room for sitting.

Don't sweat the details on cleaning. Just wipe down visible surfaces and inside sinks. Make sure there is toilet paper, and clean the toilet if it looks dirty. Fluff the guest pillows and vacuum and sweep if you can see the floors are dirty.

Light candles and a fire if you have a fireplace as a final touch.
This blog is brought to you by rehab jobs.
read more "Quickly Ready your Home for Guests"

Quickly Ready your Home for Guests

Getting your home ready for guests can turn into a big ordeal. Here are a few bare essentials you can take care of quickly that will make your home look plenty ready for guests during the holidays.

First, go outside and look at what your guests will see as they walk to your front door. If there are any ice patches to spread salt on or snow to be shoveled take care of that first. Maybe the front house light is burned out and in need of replacement. Set a couple of planters out front with Christmas plants in them such as poinsettias. Big red bows around your porch railing can look very festive and are quick and easy to tie.

Now, open the front door and check out the view. Often we have our favorite jackets, snow hats, and mittens hung over railings or on the counter tops. Gather these things up and put them away for now. You can easily get them all out again as soon as your company is gone.

Clear out a few coats from the coat closet so guests can hang their coats in it. Make room on the floor of your coat closet for guests to keep their shoes. This is especially handy if you have a dog who eats guests' shoes like I do.

Make sure there are plenty of chairs available for guests to sit in. Make sure your couches don't have excessive pillows decorating them that don't leave enough room for sitting.

Don't sweat the details on cleaning. Just wipe down visible surfaces and inside sinks. Make sure there is toilet paper, and clean the toilet if it looks dirty. Fluff the guest pillows and vacuum and sweep if you can see the floors are dirty.

Light candles and a fire if you have a fireplace as a final touch.
This blog is brought to you by rehab jobs.
read more "Quickly Ready your Home for Guests"

An advent calendar done. (12 days late!)

So what if it's supposed to be for the 24 days before Christmas? The Bub is two and he doesn't really understand why there's only been an advent box every few days or so, with the wrong days on them. (Yesterday was "22." Yeah.)But now, we'll be good to go for the 12 days before Christmas. I get some credit for that, right? :)I showed you the start of these here, but I just couldn't get back to
read more "An advent calendar done. (12 days late!)"

Yes, more greenery.

So the Stink Eye Sister strikes again. She walked by me tonight as I wrapped lights around some greenery and gave me the Eye: "More greenery?" (Stink eye.)Whatever Sister. Yes, more greenery. Shut it. I wanted to show you the various places I put the stuff... It really is such an inexpensive way to make your home pretty and just plain loverly this time of year. **Edited to add -- the Nesting
read more "Yes, more greenery."

Bling bling your light fixtures

First of all, thanks for all the sweet comments on my Bub. He had a great birthday, and I cannot believe he is two! Funny how the terrible two's started literally on his birthday. Huh. Interesting. (His "terrible" is not so bad, but still.)So tonight I wanted to share how easy it is to add some bling bling on your chandeliers or light fixtures. My example for the class is my $30 kitchen
read more "Bling bling your light fixtures"

Clothes Pin Ornaments

Old fashioned wooden clothes pins can make quite cute Santa ornaments. Make sure to get the kind pictured below, the kind with the hinges might work, but not quite as well. You’ll need red and white felt, red pipe cleaners, red, black, yellow, and peach paint, acrylic is probably the cheapest and easiest, and glue.

The clothes pins have what looks like legs already, and small torsos, so without even getting started you can imagine how the Santa will look. First glue a one to two inch piece of clothes hanger on each side of the clothes pin. If you have a drill, you can simply drill through the clothes pin and string one longer piece of pipe cleaner through for his arms.

Next, paint everything but the top part, which will be the head, red. After the paint has dried use black paint to paint the bottom sections of his legs black, like boots. Use the black paint to draw a line where his coat would be covering his pants. Draw a black belt around his waist, and draw on two small dots for his eyes. Use the yellow paint to draw a square buckle on his belt. Use the peach to make his cheeks look rosy.

Cut a small rectangle of red felt and roll it into a cone to be used as the Santa hat, then glue it in place. Glue on a bit of white felt for his beard, and use a little more white felt for trim on santa’s hat.

Using a bit of red thread and a needle, sew a loop onto the Santa hat. This will be your ornament hanger.

This blog is brought to you by dialysis nursing jobs.
read more "Clothes Pin Ornaments"

Clothes Pin Ornaments

Old fashioned wooden clothes pins can make quite cute Santa ornaments. Make sure to get the kind pictured below, the kind with the hinges might work, but not quite as well. You’ll need red and white felt, red pipe cleaners, red, black, yellow, and peach paint, acrylic is probably the cheapest and easiest, and glue.

The clothes pins have what looks like legs already, and small torsos, so without even getting started you can imagine how the Santa will look. First glue a one to two inch piece of clothes hanger on each side of the clothes pin. If you have a drill, you can simply drill through the clothes pin and string one longer piece of pipe cleaner through for his arms.

Next, paint everything but the top part, which will be the head, red. After the paint has dried use black paint to paint the bottom sections of his legs black, like boots. Use the black paint to draw a line where his coat would be covering his pants. Draw a black belt around his waist, and draw on two small dots for his eyes. Use the yellow paint to draw a square buckle on his belt. Use the peach to make his cheeks look rosy.

Cut a small rectangle of red felt and roll it into a cone to be used as the Santa hat, then glue it in place. Glue on a bit of white felt for his beard, and use a little more white felt for trim on santa’s hat.

Using a bit of red thread and a needle, sew a loop onto the Santa hat. This will be your ornament hanger.

This blog is brought to you by dialysis nursing jobs.
read more "Clothes Pin Ornaments"

Make your own picture frame ornament

There are many types of Christmas tree ornaments that you can make fairly easily and you won’t have to spend a lot of money on materials. These can be fun if you are the crafty type, and they are especially fun for kids to make. Some are as simple as baking cookies and hanging them from ribbons, but others need a bit more explanation.

Use a juice can lid to make a pretty picture frame ornament. Cut a round picture out to use in your ornament. You can choose a picture of a family member or a picture of something that makes you feel the holiday cheer, like an angel, santa, or reindeer. Glue the picture to the top of the lid. Now, you’ll need a piece of decorative cording to glue around the edge of your picture. Glue a piece of ribbon that is six to ten inches long or so to the back of the can. Glue the ribbon so it has a few inches on each side of the place where you glued it. Tie the ends together in a bow, this is how you’ll hang the ornament. Next, glue a piece of lace around the edge of the lid on the back. Your ornament should be ready to hang as soon as the glue dries.

You can be a little creative with these instructions if you prefer, instead of using cording around the picture, maybe you’d rather use a thin ribbon. Or, Use a wide sheer ribbon around the ornament instead of lace. Have fun!

Check back soon for directions on how to make a poinsettia ornament.

This blog is brought to you by physician staffing.
read more "Make your own picture frame ornament"

Make your own picture frame ornament

There are many types of Christmas tree ornaments that you can make fairly easily and you won’t have to spend a lot of money on materials. These can be fun if you are the crafty type, and they are especially fun for kids to make. Some are as simple as baking cookies and hanging them from ribbons, but others need a bit more explanation.

Use a juice can lid to make a pretty picture frame ornament. Cut a round picture out to use in your ornament. You can choose a picture of a family member or a picture of something that makes you feel the holiday cheer, like an angel, santa, or reindeer. Glue the picture to the top of the lid. Now, you’ll need a piece of decorative cording to glue around the edge of your picture. Glue a piece of ribbon that is six to ten inches long or so to the back of the can. Glue the ribbon so it has a few inches on each side of the place where you glued it. Tie the ends together in a bow, this is how you’ll hang the ornament. Next, glue a piece of lace around the edge of the lid on the back. Your ornament should be ready to hang as soon as the glue dries.

You can be a little creative with these instructions if you prefer, instead of using cording around the picture, maybe you’d rather use a thin ribbon. Or, Use a wide sheer ribbon around the ornament instead of lace. Have fun!

Check back soon for directions on how to make a poinsettia ornament.

This blog is brought to you by physician staffing.
read more "Make your own picture frame ornament"

5:33 p.m.

At 5:33 p.m. two years ago I thought:I had lovedI had felt joy I had criedI had seen miraclesI had known the random kindness of strangersI had felt loveI loved my husbandI knew so muchMy heart was fullAnd then, at 5:34 p.m., this boy came into our lives:And then, I understoodthat there's no love like the love for your childwhat unadulterated, boundless joy felt likethat I had never cried quite
read more "5:33 p.m."

Our beautiful tree. Take two.

Isn't that gorg? I used the starburst setting on my camera!First of all, ya'll are SO sweet! You made me feel so much better, I almost did cry just reading all your comments! :)So we did the tree back up and I think it looks as good as the first time. It took FOREVER to get all the ornaments, ribbon, beady things, flowers, back in...how is it this time it took longer than the first when only half
read more "Our beautiful tree. Take two."

Tree catastrophe

Soooooooo yeah...Remember yesterday when I said I was going to get all of the Christmas stuff done and out and all the bins put away? Well, I did. I got it ALL done. And I was basking in it all evening. Even got to bed before midnight. This morning we woke up to this:I didn't cry. Close. I didn't cry. Our ten foot real tree, base filled with water...on the floor. Oh for all that is good, you've
read more "Tree catastrophe"

The winner is...and holiday stress

The winner of the Favorite Things giveaway is Erinn at The Pack Crew!! I loved her favorites too, so this is perfect. (My sister picked the number, so it was totally unbiased. And I added all of you in who don't have blogs too!) And if I haven't visited you yet, I will!Sooo, are you done with your decorations yet? I'm almost there. Today, I swear, I'm done. (I've been saying that for a week now.)
read more "The winner is...and holiday stress"

Make your own poinsettia ornament

A lovely poinsettia ornament is easy to make, and what captures the holiday spirit better than a poinsettia?

You’ll need to cut a circle out of cardboard to start with. Your circle can be as big as you want the ornament to be, usually 3-4 inches across. Use the mouth of a large cup to trace around the cardboard for your cutout. Now, you’ll need a small amount of red, green and white felt. Cut two pieces of green felt out that are slightly bigger than your piece of cardboard. You’ll want to make sure that about a fourth of an inch of green felt is overhanging the cardboard cutout on all sides. Glue one circle of green felt to each side of the cardboard. Now, using a needle and some thick red thread or thin red string, sew the sides of the felt together using stitches that are about an eighth of an inch apart. When you’re done, use the thick red thread to sew a large loop of thread through for your ornament hanger, tie it together. Next, you will need to cut out diamond shapes from the red felt. Each diamond shape should be a little less wide than half of your ornament so far. Arrange the diamonds like petals of the poinsettia, gluing each one on. You’ll want them layered to look more real. The top layer looks best if it is just four diamonds. Where the diamonds come together, glue three small circles of white felt, each only about 3/8 of an inch in diameter.

This blog is brought to you by occupational therapy jobs.
read more "Make your own poinsettia ornament"

Make your own poinsettia ornament

A lovely poinsettia ornament is easy to make, and what captures the holiday spirit better than a poinsettia?

You’ll need to cut a circle out of cardboard to start with. Your circle can be as big as you want the ornament to be, usually 3-4 inches across. Use the mouth of a large cup to trace around the cardboard for your cutout. Now, you’ll need a small amount of red, green and white felt. Cut two pieces of green felt out that are slightly bigger than your piece of cardboard. You’ll want to make sure that about a fourth of an inch of green felt is overhanging the cardboard cutout on all sides. Glue one circle of green felt to each side of the cardboard. Now, using a needle and some thick red thread or thin red string, sew the sides of the felt together using stitches that are about an eighth of an inch apart. When you’re done, use the thick red thread to sew a large loop of thread through for your ornament hanger, tie it together. Next, you will need to cut out diamond shapes from the red felt. Each diamond shape should be a little less wide than half of your ornament so far. Arrange the diamonds like petals of the poinsettia, gluing each one on. You’ll want them layered to look more real. The top layer looks best if it is just four diamonds. Where the diamonds come together, glue three small circles of white felt, each only about 3/8 of an inch in diameter.

This blog is brought to you by occupational therapy jobs.
read more "Make your own poinsettia ornament"

So I can put stuff in them...

Here's the link to the Favorite Things party again...I won't pick a winner of the giveway till Saturday morning, so you have till then to join in! This has been so much fun!So lately I've become quite enamored with apothecary jars, as I know many of us have. I just didn't want to spend a load on them, so I've been picking up a few as I've seen them over the past few months. My sister (She lives
read more "So I can put stuff in them..."

Christmas Decoration Crafts - Part Four

Put the mixture you created (see previous blog) into a paper bag along with the orange and roll the orange around inside until it is totally coated in the spices. Leave the orange in the bag in a cool dry place for about a month. Each day roll the orange in the spices again.

The orange may finish curing in as few as three weeks if you live in a very dry climate, and if you live somewhere more humid it may take up to six months. You’ll know your pomander is done when you tap it and hear a hollow sound and the orange feels light in weight. When the pomander reaches this point you’ll want to shake off any extra spices before displaying it in your home.

I find that because you need to remember to roll the orange in the mixture at least every few days for a month or more, it makes sense to make more than one of these at a time, especially since they last for years. You could even make a whole batch and give them away as holiday gifts.

Pomanders look good displayed in pairs in a decorative bowl or on a decorative plate on a bed of cloves or potpourri. If you feel like getting creative, insert the cloves into your pomander in a pattern or add ribbon to your finished product.

If your pomander starts to lose its scent you can simply mix up a batch of spice mixture and re roll the orange in the mixture.

Check back soon for the next part of this blog.

This blog is brought to you by dialysis nursing.
read more "Christmas Decoration Crafts - Part Four"

Christmas Decoration Crafts - Part Four

Put the mixture you created (see previous blog) into a paper bag along with the orange and roll the orange around inside until it is totally coated in the spices. Leave the orange in the bag in a cool dry place for about a month. Each day roll the orange in the spices again.

The orange may finish curing in as few as three weeks if you live in a very dry climate, and if you live somewhere more humid it may take up to six months. You’ll know your pomander is done when you tap it and hear a hollow sound and the orange feels light in weight. When the pomander reaches this point you’ll want to shake off any extra spices before displaying it in your home.

I find that because you need to remember to roll the orange in the mixture at least every few days for a month or more, it makes sense to make more than one of these at a time, especially since they last for years. You could even make a whole batch and give them away as holiday gifts.

Pomanders look good displayed in pairs in a decorative bowl or on a decorative plate on a bed of cloves or potpourri. If you feel like getting creative, insert the cloves into your pomander in a pattern or add ribbon to your finished product.

If your pomander starts to lose its scent you can simply mix up a batch of spice mixture and re roll the orange in the mixture.

Check back soon for the next part of this blog.

This blog is brought to you by dialysis nursing.
read more "Christmas Decoration Crafts - Part Four"

Evil, I tell you.

Keep linking here chicks!! Alrighty, at least two of you evil sweet ladies posted about THESE:All I have to say is I hold you personally responsible for the FIVE SEVEN pounds I'm going to gain this week from eating these. And I don't like candy canes. But I. love. these. EVIL.Tiny bit of mint, whole lotta chocolate, little bit of crunch = HEAVEN.I've even been passing them out to random people to
read more "Evil, I tell you."

Christmas Decoration Crafts - Part Three

Pomanders have long been used to scent homes pleasantly. Carry on this tradition by creating a few of your own. Another plus is that they can be hung with ribbon or a few can be displayed in a bowl for a pleasant holiday decorations. Another great thing about pomanders is that when made correctly, they can last for years. Pomanders are usually made using a citrus fruit, most commonly oranges, although sometimes lemons or apples. I think oranges look the best and stand up to the test of time the best.

You’ll need to poke holes in the orange where you will be pushing the cloves into the rind. A toothpick or knitting needle can be used to do this. You may want to use a thimble to do this to protect your pushing finger. You can also cover your fingers with masking tape to protect them. How far apart you space the cloves is up to you, but don’t space them further than ¼ inch apart. The closer together you place the cloves the more scented the final product will be. But, you do want to leave a little space between each clove because as your orange shrinks the cloves will be pulled closer together. Next, fill each hole with a clove. When you’ve got the whole orange studded with cloves, you’re ready to roll your pomander in a special mixture to preserve it and make it more scented.

This mixture you’ll roll your pomander in consists of several drops of sandlewood and one tablespoon of cinnamon, nutmeg, and ground cloves. Sandlewood is a natural preservative, so make sure not to leave it out of your mixture.

Check back soon for the next part of this blog.

This blog is brought to you by rehab jobs.
read more "Christmas Decoration Crafts - Part Three"

Christmas Decoration Crafts - Part Three

Pomanders have long been used to scent homes pleasantly. Carry on this tradition by creating a few of your own. Another plus is that they can be hung with ribbon or a few can be displayed in a bowl for a pleasant holiday decorations. Another great thing about pomanders is that when made correctly, they can last for years. Pomanders are usually made using a citrus fruit, most commonly oranges, although sometimes lemons or apples. I think oranges look the best and stand up to the test of time the best.

You’ll need to poke holes in the orange where you will be pushing the cloves into the rind. A toothpick or knitting needle can be used to do this. You may want to use a thimble to do this to protect your pushing finger. You can also cover your fingers with masking tape to protect them. How far apart you space the cloves is up to you, but don’t space them further than ¼ inch apart. The closer together you place the cloves the more scented the final product will be. But, you do want to leave a little space between each clove because as your orange shrinks the cloves will be pulled closer together. Next, fill each hole with a clove. When you’ve got the whole orange studded with cloves, you’re ready to roll your pomander in a special mixture to preserve it and make it more scented.

This mixture you’ll roll your pomander in consists of several drops of sandlewood and one tablespoon of cinnamon, nutmeg, and ground cloves. Sandlewood is a natural preservative, so make sure not to leave it out of your mixture.

Check back soon for the next part of this blog.

This blog is brought to you by rehab jobs.
read more "Christmas Decoration Crafts - Part Three"

Christmas Decoration Crafts - Part Two

Wreaths are commonly used for Christmas decorations. They are usually quick to make, and there is a large variety of types to choose from, many more than I’ll list here.


I think the cutest one is a wreath made with dog bones. You can hang it over your dog’s bed inside and when the season is over, you can give most of it to your dog to eat. Start with a Styrofoam or cardboard shape. Secure a piece of ribbon to it, and then wind it around the circle on a slight diagonal, like stripes on a candy cane. Make sure the ribbon totally covers the cardboard or Styrofoam. Next, you’ll tie the dog bones onto the wreath using more ribbon. Get creative with the types of dog bones you use if you want a more colorful end product. Rubber dog bones come in bright colors, it looks cute to use red and green rubber dog bones. If you want to add more to this wreath tie evergreen sprigs around it also.

This next wreath is very elegant and pretty, it looks almost like light snow gathered into a wreath. You’ll need to form a wire clothes hanger into a circle using some wire cutters and needle nose pliers. Next, you’ll need to tie plastic sandwich bags around the wire using a simple knot. Tie them around until you’ve filled the circle. Add a shimmery bow around the finished wreath.

Check back soon for the next part of this blog.

This blog is brought to you by nephrology jobs.
read more "Christmas Decoration Crafts - Part Two"

Christmas Decoration Crafts - Part Two

Wreaths are commonly used for Christmas decorations. They are usually quick to make, and there is a large variety of types to choose from, many more than I’ll list here.


I think the cutest one is a wreath made with dog bones. You can hang it over your dog’s bed inside and when the season is over, you can give most of it to your dog to eat. Start with a Styrofoam or cardboard shape. Secure a piece of ribbon to it, and then wind it around the circle on a slight diagonal, like stripes on a candy cane. Make sure the ribbon totally covers the cardboard or Styrofoam. Next, you’ll tie the dog bones onto the wreath using more ribbon. Get creative with the types of dog bones you use if you want a more colorful end product. Rubber dog bones come in bright colors, it looks cute to use red and green rubber dog bones. If you want to add more to this wreath tie evergreen sprigs around it also.

This next wreath is very elegant and pretty, it looks almost like light snow gathered into a wreath. You’ll need to form a wire clothes hanger into a circle using some wire cutters and needle nose pliers. Next, you’ll need to tie plastic sandwich bags around the wire using a simple knot. Tie them around until you’ve filled the circle. Add a shimmery bow around the finished wreath.

Check back soon for the next part of this blog.

This blog is brought to you by nephrology jobs.
read more "Christmas Decoration Crafts - Part Two"

Christmas Decoration Crafts - Part One

Now that Thanksgiving has passed it is time to take down your fall decorations and start putting up your Christmas decorations. I’m going to focus on decorations that you can make yourself for a cheap price.

One of the easiest and cheapest decorations is painting bricks to use as bookends or to display on tables throughout the home. This is a fun decoration for kids to do too. All you need are a few bricks, paint, and paintbrushes. Look online for inspiration and ideas of what to paint. Paint a snowman, Santa Clause, or a reindeer on the front of your brick.


Wrap your design around the sides of the brick too if they will be seen where you choose to display them. If you are not very good at painting, you could just paint alternating red and white stripes on a brick, or green with red polka dots, any pattern really. If you want to get more detailed, use some felt or other material to glue onto the brick as clothing for whatever character you painted. It is a good idea to glue felt on the bottom of the bricks so they don’t scratch up the furniture you choose to place them on. These cute bricks can be displayed anywhere by themselves, or in groups. They make wonderful door stops, table decorations, or mantle decorations.

Check back soon for the next part of this blog.

This blog is brought to you by physical therapy jobs.
read more "Christmas Decoration Crafts - Part One"

Christmas Decoration Crafts - Part One

Now that Thanksgiving has passed it is time to take down your fall decorations and start putting up your Christmas decorations. I’m going to focus on decorations that you can make yourself for a cheap price.

One of the easiest and cheapest decorations is painting bricks to use as bookends or to display on tables throughout the home. This is a fun decoration for kids to do too. All you need are a few bricks, paint, and paintbrushes. Look online for inspiration and ideas of what to paint. Paint a snowman, Santa Clause, or a reindeer on the front of your brick.


Wrap your design around the sides of the brick too if they will be seen where you choose to display them. If you are not very good at painting, you could just paint alternating red and white stripes on a brick, or green with red polka dots, any pattern really. If you want to get more detailed, use some felt or other material to glue onto the brick as clothing for whatever character you painted. It is a good idea to glue felt on the bottom of the bricks so they don’t scratch up the furniture you choose to place them on. These cute bricks can be displayed anywhere by themselves, or in groups. They make wonderful door stops, table decorations, or mantle decorations.

Check back soon for the next part of this blog.

This blog is brought to you by physical therapy jobs.
read more "Christmas Decoration Crafts - Part One"

Christmas through my son's eyes

Keep linking to the party here ladies! What fun this is! I am loving seeing what you all are loving right now! I've already found about ten things I HAVE TO HAVE and quite a few projects I'm going to try out too. (Sorry about the mess with Mr. Linky. He's on my crap list right now.)So as I was thinking of more of my favorites right now, my son came to mind. This season has shown me example one
read more "Christmas through my son's eyes"

Tell us a few of your favorite things!!

Copy HTML below to add to your blog!<a target="_blank" href="http://thriftydecorchick.blogspot.com/"><img border="0" width="200" src="http://www.homespun-threads.com/images/favoritethings.gif" height="279"/></a>**Edited to add that I've extended this for the giveaway till Saturday at noon. So keep linking till then! And you are still welcome to keep posting after that just for fun!
read more "Tell us a few of your favorite things!!"

Got a front door?

Then you can do this:And make the outside of your house as pretty as the inside.You'll need:A door. (I'm funny.)Numerous garlands ($3 or less each)Numerous light strandsLarge or small cup hooksStep ladderMeasuring tapeMeasure the height and width of your front door. Take your garland and figure how many feet you'll need. Most come in nine foot sections. (By the way, you can easily cut these to
read more "Got a front door?"

Purdiest Christmas tree EVER.

Would you BELIEVE this is made out of these?:OH, I am ROLLING!!! Not because it's made of Mountain Dew cans, but because I actually think it's kind of pretty!! My favorite part is the "star" on top. Have I lost my mind? Just another testimonial to the magic of Christmas lights -- they can make anything pretty!Anyone up for a soda can tree? And talk about thrifty -- just save up your pop cans and
read more "Purdiest Christmas tree EVER."

Happy Thanksgiving!!

We slept in till 9, are watching the parade, and are about to start the pancakes. Does it get any better? I don't think so!Couldn't let the day go by without saying Happy Thanksgiving to you all. Enjoy, stuff yourself, enjoy your families, and try to relax at some point. I am very thankful for all of you. (Sniff.)Oh, and give my "pet" turkey a pet. :)
read more "Happy Thanksgiving!!"

Magic. Take Two.

You so know me by now and were probably expecting this...but I had to make a change. The tree candles on the mantel were so...oh I don't know, 2006. I adore them, but they just didn't do the GORG magnolia garland justice. Sooooo...I took floral foam, stuck a ton of garland in there, wrapped 100 lights in it (Good LORD!) and more flowers. Ummmm...love it. But is it too much? Even if it is, I
read more "Magic. Take Two."

Magic.

First off, you need to know I can't get enough of certain things. All year round, you know by now, it's molding of any kind. In the spring and summer, it's landscaping bricks outside. At Christmas-time, it's greenery. My house looks like a pine tree threw up all over it (but in a pretty way) by the time I'm done every season. And every year, I add more. My style is very traditional, and there's
read more "Magic."

Countdowns for the kiddies!

Woooeeee, I am modge-podged OUT! I started one project tonight I just couldn't wait to show you and finished one I couldn't wait to show you. :) First, the finished...I got this vinyl design at Uppercase Living (you saw it here) -- and I got it FREE! I hosted a party, sold quite a bit and got three items for only $14. I was eyeing this one for weeks beforehand, so I had plenty of time to figure
read more "Countdowns for the kiddies!"

Do you follow?

OK, I've been going back and forth on this for months...the new followers thing on Blogger has created love/hate feelings for me. Love it because when I get a new "follower" (HATE that term), I practically squeal with glee I'm so excited!! Hate it because when I used to see them on blogs, I was so turned off by it, like I was in high school again and it was a weird popularity contest.I know, I
read more "Do you follow?"

Easy Home Projects - Part Three

Painting your front door makes a big difference in the first impression your home gives. Paint your door a color that you love like orange or red. Replace your house numbers with new modern house numbers. While you’re at it, repaint your mailbox post. You could also repaint your porch railing to make over the entry way to your home.

Even if you don’t have a room in your entry way, you can create an entry way easily. All you need to do is place a bench near the front door with coat hooks above it. Put baskets underneath that pull out for quick storage of shoes and other items such as library books. Having a bench in the entry way is very convenient as well as looking good, most people find them to be quite useful.

If you want to give a room a comfortable country style make over try putting wainscoting around the room topped with chair rail. Paint it a color that is a couple of shades darker or lighter than the wall color or go bold and paint it a contrasting color.

Laminate flooring that looks like hardwood is a breeze to install. You could do a small room in one weekend quite easily. There are also stick down bathroom floor tiles that look like tile floor. If your bathroom floor is linoleum and outdated, this could really help the look.

Check back soon for the next portion of this blog.

This blog is brought to you by occupational therapy jobs.
read more "Easy Home Projects - Part Three"

Easy Home Projects - Part Three

Painting your front door makes a big difference in the first impression your home gives. Paint your door a color that you love like orange or red. Replace your house numbers with new modern house numbers. While you’re at it, repaint your mailbox post. You could also repaint your porch railing to make over the entry way to your home.

Even if you don’t have a room in your entry way, you can create an entry way easily. All you need to do is place a bench near the front door with coat hooks above it. Put baskets underneath that pull out for quick storage of shoes and other items such as library books. Having a bench in the entry way is very convenient as well as looking good, most people find them to be quite useful.

If you want to give a room a comfortable country style make over try putting wainscoting around the room topped with chair rail. Paint it a color that is a couple of shades darker or lighter than the wall color or go bold and paint it a contrasting color.

Laminate flooring that looks like hardwood is a breeze to install. You could do a small room in one weekend quite easily. There are also stick down bathroom floor tiles that look like tile floor. If your bathroom floor is linoleum and outdated, this could really help the look.

Check back soon for the next portion of this blog.

This blog is brought to you by occupational therapy jobs.
read more "Easy Home Projects - Part Three"

Day of Blessed.

Life holds so many simple blessings, each day bringing its own individual wonder. John McLeod My day started with my alarm clock, aka the Bub, waking me at 8:30. I don't use a real alarm clock anymore. For this I am thankful.A morning spent hanging with the Boy, taking our time, playing. For that I feel blessed.Today I got our garage door fixed, did two loads of laundry, got our surround sound
read more "Day of Blessed."

Easy Home Projects - Part Two

Paint or wallpaper one wall in your bedroom a brighter color than the others. This accent wall will make your bedroom look more interesting. Wallpapers are available in practically any texture and color you can imagine, so have fun shopping around.

If you have an old dresser you’re using somewhere in your house that isn’t very attractive consider giving it a makeover. Sand it down and paint it a bright color or stain. Add polyurethane so the color will last. Add new drawer pulls that are up to date. You may even want to makeover other pieces of furniture in the same room to match.

If you dining room chairs have fabric seats you will probably need to reupholster them at some point, because the seat fabric always seems to get dingy far before the table starts to look dingy too. Choose a stylish fabric and cut it an extra two inches wide all the way around the shape of the seat. Wrap the fabric around the seat and staple it in place.

Home offices always seem to be places where clutter loves to live. Take the time to organize all of the clutter. Investing in a few matching boxes and files will help a lot. Label everything and pay attention the layout so it will be easy to put things where they belong before clutter gets the better of the room again.

Check back soon for the next portion of this blog.

This blog is brought to you by locum tenens.
read more "Easy Home Projects - Part Two"

Easy Home Projects - Part Two

Paint or wallpaper one wall in your bedroom a brighter color than the others. This accent wall will make your bedroom look more interesting. Wallpapers are available in practically any texture and color you can imagine, so have fun shopping around.

If you have an old dresser you’re using somewhere in your house that isn’t very attractive consider giving it a makeover. Sand it down and paint it a bright color or stain. Add polyurethane so the color will last. Add new drawer pulls that are up to date. You may even want to makeover other pieces of furniture in the same room to match.

If you dining room chairs have fabric seats you will probably need to reupholster them at some point, because the seat fabric always seems to get dingy far before the table starts to look dingy too. Choose a stylish fabric and cut it an extra two inches wide all the way around the shape of the seat. Wrap the fabric around the seat and staple it in place.

Home offices always seem to be places where clutter loves to live. Take the time to organize all of the clutter. Investing in a few matching boxes and files will help a lot. Label everything and pay attention the layout so it will be easy to put things where they belong before clutter gets the better of the room again.

Check back soon for the next portion of this blog.

This blog is brought to you by locum tenens.
read more "Easy Home Projects - Part Two"

Easy Home Projects - Part One

Large home projects are daunting tasks, and often they don’t get done. But, there are plenty of small home projects that you can easily get done in a weekend, some even in a couple of hours, that can make your home look cuter. Another good thing about these small projects is that they are mostly fairly inexpensive and can be done on a budget.

Rearrange your living room furniture. Simply rearranging a room is free of course, and it can make the room feel fresh and new. Try planning out how you want to arrange the room on paper to save the time and effort of trial and error when moving things around. Think about getting rid of any extra tables or junk you don’t need, or bring in a table or accent piece from another room if you actually don’t have enough in your living room. Make sure you put the coffee table close enough to the couch to easily set drinks on it.

Adding a small shelf at eye level to a wall that doesn’t have enough pizzazz can really give a room more personality. You can use the shelf to display small framed pictures and art, candles, or some other item. You can layer them a little bit for a more interesting look, or space them a few inches apart for a modern sleek look.

Check back soon for the next portion of this blog.

This blog is brought to you by physician staffing.
read more "Easy Home Projects - Part One"

Easy Home Projects - Part One

Large home projects are daunting tasks, and often they don’t get done. But, there are plenty of small home projects that you can easily get done in a weekend, some even in a couple of hours, that can make your home look cuter. Another good thing about these small projects is that they are mostly fairly inexpensive and can be done on a budget.

Rearrange your living room furniture. Simply rearranging a room is free of course, and it can make the room feel fresh and new. Try planning out how you want to arrange the room on paper to save the time and effort of trial and error when moving things around. Think about getting rid of any extra tables or junk you don’t need, or bring in a table or accent piece from another room if you actually don’t have enough in your living room. Make sure you put the coffee table close enough to the couch to easily set drinks on it.

Adding a small shelf at eye level to a wall that doesn’t have enough pizzazz can really give a room more personality. You can use the shelf to display small framed pictures and art, candles, or some other item. You can layer them a little bit for a more interesting look, or space them a few inches apart for a modern sleek look.

Check back soon for the next portion of this blog.

This blog is brought to you by physician staffing.
read more "Easy Home Projects - Part One"

Gifts I don't want to give.

I'll admit I've done this before...found something perfect for a friend and realized by the time I got it home how perfect it was for ME. I feel guilty about it every time I look at that ring I gifted back to myself... Nah, notsomuch. I love it. I'm sure what I got her instead was great. Can't remember. Anyway, I'm having this problem again with some gifts I put together over the weekend. I heart
read more "Gifts I don't want to give."

Merge Style and Function - Part Two

If you want to display your kids’ artwork, but you don’t like how it looks cluttered on the refrigerator, try a more stylish alternative. You can hang a linen covered bulletin board covered with a cute pattern or just a solid color that matches the room it is in. Hand the artwork on this with small pins. You can also hang colored string across the ceiling in rows and attach clips to it to display art work all along the ceiling.

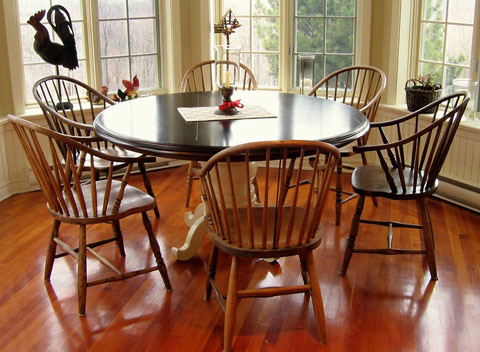
Apply the same rules to picking out a kitchen table as discussed above for coffee table selection. Also, kitchen tables that are round can be a big plus if you have a family because it will help encourage conversation. Also, the less corners the better when you have kids in the house.

There are even paint types available today that can help you reach your design goals. Use high quality latex paint and your walls will wipe clean easily. Use magnetic primer under your paint and you can display art directly on the walls. Try a chalkboard paint in a kid’s room or a play room if they like drawing with chalk.

Carpet is probably not the best choice if you have a family. A spill can turn into a stressful cleanup that ends up staining. Hardwood flooring or even a laminate that looks like hardwood, can stand up to messes and look great at the same time.

Get a big cupboard for your living room or playroom and fill it with labeled baskets. These baskets can be used to store toys and can be easily organized. If you get cute wicker baskets you could even store them on shelving and the room would still look nice. Benches are good in playrooms or kids’ rooms too, because you can put baskets underneath for extra storage.
This blog is brought to you by nephrology jobs.
read more "Merge Style and Function - Part Two"

Merge Style and Function - Part Two

If you want to display your kids’ artwork, but you don’t like how it looks cluttered on the refrigerator, try a more stylish alternative. You can hang a linen covered bulletin board covered with a cute pattern or just a solid color that matches the room it is in. Hand the artwork on this with small pins. You can also hang colored string across the ceiling in rows and attach clips to it to display art work all along the ceiling.

Apply the same rules to picking out a kitchen table as discussed above for coffee table selection. Also, kitchen tables that are round can be a big plus if you have a family because it will help encourage conversation. Also, the less corners the better when you have kids in the house.

There are even paint types available today that can help you reach your design goals. Use high quality latex paint and your walls will wipe clean easily. Use magnetic primer under your paint and you can display art directly on the walls. Try a chalkboard paint in a kid’s room or a play room if they like drawing with chalk.

Carpet is probably not the best choice if you have a family. A spill can turn into a stressful cleanup that ends up staining. Hardwood flooring or even a laminate that looks like hardwood, can stand up to messes and look great at the same time.

Get a big cupboard for your living room or playroom and fill it with labeled baskets. These baskets can be used to store toys and can be easily organized. If you get cute wicker baskets you could even store them on shelving and the room would still look nice. Benches are good in playrooms or kids’ rooms too, because you can put baskets underneath for extra storage.
This blog is brought to you by nephrology jobs.
read more "Merge Style and Function - Part Two"

And the winners are...

I know you've been waiting ALL weekend for this! (Not.)Drum roll please...CARRIE! From Carrie's Little World got the big letter!!And...SARAH from In My Own Little Corner won a letter as well. (This one will be slightly smaller than the HUGE one.)And just because I couldn't stop there...I picked one more for another smaller letter...PAM from Pam's Place/Blue Lady Bug you are the third winner!If
read more "And the winners are..."

Merge Style and Function - Part One

There are several things you can do to help your home look stylish when you have kids with products that will stand the test of abuse. Some of these tips can help organize and reduce clutter but they also look good.

Have a bench in your entryway. This will be where all shoes get removed. You can place a couple of baskets underneath the bench in which shoes can be stored. You can get a cute rug to go under the bench that will gather the dirt and help contain it.

Keep a basket at the landing of your stairs. Use it to hold things that you know you’ll need to take upstairs or downstairs. This way you can keep surfaces in your home clutter free without having to run up and down the stairs to put away each item individually.

Take care when you pick out your coffee table. Coffee tables tend to get dinged up quickly, so you should make sure you choose a table that is durable. If you are going to go with wood, choose a hard wood like oak and choose a table that has been polyurethaned. Steer clear of glass coffee tables, not only could they be broken during roughhousing, but they show finger prints much more easily than wood does.

Leather is a good choice for upholstery because you can wipe it clean. Leather tends to look better as it gets older too, which you can’t say about other upholstery materials. Leather is quite durable and should be able to hold up well if you have kids and pets.

Check back soon for the next portion of this blog.

This blog is brought to you by locum tenens.
read more "Merge Style and Function - Part One"

Merge Style and Function - Part One

There are several things you can do to help your home look stylish when you have kids with products that will stand the test of abuse. Some of these tips can help organize and reduce clutter but they also look good.

Have a bench in your entryway. This will be where all shoes get removed. You can place a couple of baskets underneath the bench in which shoes can be stored. You can get a cute rug to go under the bench that will gather the dirt and help contain it.

Keep a basket at the landing of your stairs. Use it to hold things that you know you’ll need to take upstairs or downstairs. This way you can keep surfaces in your home clutter free without having to run up and down the stairs to put away each item individually.

Take care when you pick out your coffee table. Coffee tables tend to get dinged up quickly, so you should make sure you choose a table that is durable. If you are going to go with wood, choose a hard wood like oak and choose a table that has been polyurethaned. Steer clear of glass coffee tables, not only could they be broken during roughhousing, but they show finger prints much more easily than wood does.

Leather is a good choice for upholstery because you can wipe it clean. Leather tends to look better as it gets older too, which you can’t say about other upholstery materials. Leather is quite durable and should be able to hold up well if you have kids and pets.

Check back soon for the next portion of this blog.

This blog is brought to you by locum tenens.
read more "Merge Style and Function - Part One"

Shout outs!

Yo! Yo! It's time for some long awaited shout outs to my sistas...OK, I'll stop being all street. It doesn't work for me, I know. (Warning...this is a looooong post.)First of all...I have to thank Aimee over at HomeSpun Threads AGAIN. She did for me in days what I've been trying to do for weeks. You can see my spiffy new header above, which I luuuuuv!! Also, she made me a few buttons. Use them if
read more "Shout outs!"

I'm in the giving mood!

Take advantage of this...I'm all misty and googly and warm-hearted this weekend. (NO, I'm not pregnant!!) Feeling the holiday love, maybe? I don't know what it is. But I was in Joann's today and thought since so many of you mentioned you don't have access to a Joann's to purchase one of the big honkin' letters I used for the monogram here, I figured I would buy one for you.Yes, I know, I rock.
read more "I'm in the giving mood!"

Decorate with Ornaments

Christmas tree ornaments can be used creatively in a variety of ways for decorating, and the best part is the low cost.

Buy two medium or large clear ornaments and remove the metal part on top that attaches to a hook. Fill the ornaments at least half way with spices to use in hot chocolate or egg nog. One could be filled with ground nutmeg, and the other could be filled with ground cinnamon for example. Other options would be vanilla or chocolate powder, whatever you’d like really. Now, cover the openings with squares of cheesecloth. Secure the cheesecloth around the opening with silver or gold string.

Large clear ornaments can also be used to fill with bright candy, peppercorns, popcorn kernels or any other bright colored small food item. Tie bits of ribbon to the loops meant to use hooks in for hanging.

Use small sized festively colored ornaments for decorating the fridge. Tie two together using red ribbon, and hang them over a metal fridge clip that is clipped to a holiday photo or card.

Small ornaments also look cute used as decorations on cupcakes, one small ornament per cupcake.

You can make a cute centerpiece for a table using ornaments stuck on wooden skewers displayed in a vase. Use pieces of your Christmas tree in between ornaments.

Small ornaments can be tied in pairs around napkins with cute ribbon to create unique place settings for parties. Write the guests name who is to sit in each place on small pieces of paper and slip the pieces into clear ornaments, one for each pair in a setting.

This blog is brought to you by dialysis nursing jobs.
read more "Decorate with Ornaments"
Copyright © home art. All Rights Reserved.
Blogger Template designed by Big Homes.