
First of all, y'all who make their beds every day...seriously. You make all us slackers look soooo bad!! (50 percent of you said you make your bed every day on my poll. Gag.) I only make fun because I am seriously jealous. I tried to do this for about three days straight...and was way too lazy to keep it going. I love how I feel when I walk in our bedroom and the bed is made though. You may have
read more "42,000 hits. A Diny. And more."
Decorate Beautifully AND Have Pets – Part Four
Hard durable flooring is ideal for pet owners. Sealed stone, hardwood, or vinyl flooring will hold up well. If you do choose to have carpeting, get the cut pile variety. Loop pile carpet can be snagged and unraveled by a rowdy pet. An alternative to carpeting is buying several stylish area rugs. These can be cleaned easily, unlike carpet, where the carpet padding can never be fully cleaned if an animal has an accident on the carpet. Just don’t buy rugs that are too expensive, if you do you’ll be stressed out about them getting dirty. Carpet tiles of the sort often used in commercial spaces are another way to go if you want to have carpet. This way, if one square gets dirty, you can pull it up and replace it.

Brushing your pets often can really lessen the amount of hair that ends up in your home. I bought a brush called the furminator that works great on my dogs, I get a lot more hair off of them than I do with a regular brush.
Giving your dog plenty of treats is another way to help keep your furniture looking nice. If they have appealing things to chew on, they’re less likely to chew on your stuff. I go to thrift stores and stock up on small stuffed toys for my dog a couple times a year, much cheaper than buying very similar stuffed toys at a pet store.
This blog is brought to you by dialysis nursing.
read more "Decorate Beautifully AND Have Pets – Part Four"

Brushing your pets often can really lessen the amount of hair that ends up in your home. I bought a brush called the furminator that works great on my dogs, I get a lot more hair off of them than I do with a regular brush.
Giving your dog plenty of treats is another way to help keep your furniture looking nice. If they have appealing things to chew on, they’re less likely to chew on your stuff. I go to thrift stores and stock up on small stuffed toys for my dog a couple times a year, much cheaper than buying very similar stuffed toys at a pet store.
This blog is brought to you by dialysis nursing.
Decorate Beautifully AND Have Pets – Part Four
Hard durable flooring is ideal for pet owners. Sealed stone, hardwood, or vinyl flooring will hold up well. If you do choose to have carpeting, get the cut pile variety. Loop pile carpet can be snagged and unraveled by a rowdy pet. An alternative to carpeting is buying several stylish area rugs. These can be cleaned easily, unlike carpet, where the carpet padding can never be fully cleaned if an animal has an accident on the carpet. Just don’t buy rugs that are too expensive, if you do you’ll be stressed out about them getting dirty. Carpet tiles of the sort often used in commercial spaces are another way to go if you want to have carpet. This way, if one square gets dirty, you can pull it up and replace it.
Brushing your pets often can really lessen the amount of hair that ends up in your home. I bought a brush called the furminator that works great on my dogs, I get a lot more hair off of them than I do with a regular brush.
Giving your dog plenty of treats is another way to help keep your furniture looking nice. If they have appealing things to chew on, they’re less likely to chew on your stuff. I go to thrift stores and stock up on small stuffed toys for my dog a couple times a year, much cheaper than buying very similar stuffed toys at a pet store.
This blog is brought to you by dialysis nursing.
read more "Decorate Beautifully AND Have Pets – Part Four"
Brushing your pets often can really lessen the amount of hair that ends up in your home. I bought a brush called the furminator that works great on my dogs, I get a lot more hair off of them than I do with a regular brush.
Giving your dog plenty of treats is another way to help keep your furniture looking nice. If they have appealing things to chew on, they’re less likely to chew on your stuff. I go to thrift stores and stock up on small stuffed toys for my dog a couple times a year, much cheaper than buying very similar stuffed toys at a pet store.
This blog is brought to you by dialysis nursing.
Last minute Halloween.
First of all, drop everything and get to Target!! ALL their Halloween scrapbooking stuff is on clearance! They have some caaute stuff!Second of all, Good LORD, when did candy get so expensive?? I dropped $25 on candy and I still doubt we'll have enough for all the kiddos. (Need to keep a few for me. Shhh!)Third, here we go with a few last minute Halloween stuff I've put together in the past week
read more "Last minute Halloween."
Decorate Beautifully AND Have Pets – Part Three
If you’re a big sucker like me, and you like your animals to live in the lap of luxury, consider getting a fashionable piece of furniture just for your pet. If you can get your pet to use it instead of the human furniture, you’ll have a lot less couch cleaning to do. Leather bean bag chairs are a good option that I’ve seen dogs fall in love with. This same idea goes for cats too, if you buy a piece of cat furniture with a little cubby in it or a platform up high where they can lounge they won’t sleep on your furniture as much.  I made my cat a little hideaway under an end table and he sleeps there faithfully every day. If you do allow your pets on your furniture, it will probably be worth it to you to buy a small hand held vacuum. You can store it in a convenient place, such as under an end table next to the couch and even keep it plugged in. This way, it’s easy to get out and vacuum your couches often. Another option is to buy slipcovers for your couches that you can wash frequently. Slipcovers are actually in fashion right now, and they come in quite a variety of styles and fabric types.
These days there are plenty of pet accessories to choose from that will match your home. There are stainless steel food and water dishes or ceramic dishes to choose from.
Check back soon for part four of this blog.
This blog is brought to you by locum tenens.
read more "Decorate Beautifully AND Have Pets – Part Three"
 I made my cat a little hideaway under an end table and he sleeps there faithfully every day. If you do allow your pets on your furniture, it will probably be worth it to you to buy a small hand held vacuum. You can store it in a convenient place, such as under an end table next to the couch and even keep it plugged in. This way, it’s easy to get out and vacuum your couches often. Another option is to buy slipcovers for your couches that you can wash frequently. Slipcovers are actually in fashion right now, and they come in quite a variety of styles and fabric types.
These days there are plenty of pet accessories to choose from that will match your home. There are stainless steel food and water dishes or ceramic dishes to choose from.
Check back soon for part four of this blog.
This blog is brought to you by locum tenens.
Decorate Beautifully AND Have Pets – Part Three
If you’re a big sucker like me, and you like your animals to live in the lap of luxury, consider getting a fashionable piece of furniture just for your pet. If you can get your pet to use it instead of the human furniture, you’ll have a lot less couch cleaning to do. Leather bean bag chairs are a good option that I’ve seen dogs fall in love with. This same idea goes for cats too, if you buy a piece of cat furniture with a little cubby in it or a platform up high where they can lounge they won’t sleep on your furniture as much. I made my cat a little hideaway under an end table and he sleeps there faithfully every day. If you do allow your pets on your furniture, it will probably be worth it to you to buy a small hand held vacuum. You can store it in a convenient place, such as under an end table next to the couch and even keep it plugged in. This way, it’s easy to get out and vacuum your couches often. Another option is to buy slipcovers for your couches that you can wash frequently. Slipcovers are actually in fashion right now, and they come in quite a variety of styles and fabric types.
These days there are plenty of pet accessories to choose from that will match your home. There are stainless steel food and water dishes or ceramic dishes to choose from.
Check back soon for part four of this blog.
This blog is brought to you by locum tenens.
read more "Decorate Beautifully AND Have Pets – Part Three"
I made my cat a little hideaway under an end table and he sleeps there faithfully every day. If you do allow your pets on your furniture, it will probably be worth it to you to buy a small hand held vacuum. You can store it in a convenient place, such as under an end table next to the couch and even keep it plugged in. This way, it’s easy to get out and vacuum your couches often. Another option is to buy slipcovers for your couches that you can wash frequently. Slipcovers are actually in fashion right now, and they come in quite a variety of styles and fabric types.These days there are plenty of pet accessories to choose from that will match your home. There are stainless steel food and water dishes or ceramic dishes to choose from.
Check back soon for part four of this blog.
This blog is brought to you by locum tenens.
Decorate Beautifully AND Have Pets – Part Two
Pick your color scheme carefully if you have pets or anticipate having them soon. Stay away from white carpeting, curtains, or furniture, they won’t be white for long if you own pets. Black fabric and upholstery shows light animal fur really well, and it can be hard to keep it all cleaned off, so try not to use very much black in your decorating. Bold or bright colors also show fur easily. The best colors for us animal lovers are soft neutrals, any color within the range from light tan to chocolate brown will stay looking nice with pets fairly well.

Don’t use flat finish paint if you have pets. When they rub against the walls (or run into the walls as my dogs sometimes do) it will be harder to clean flat finish painted walls. It is best to avoid white walls if you can. This will force you to think about your style a little bit more, and your home will probably end up looking better if you paint them colors other than white.
Your tables and end tables will need to be sturdy. Where you have animals you’ll have play and they’ll inevitably run into your furniture. Also, keeping a lot of knick knacks on your tables probably won’t work well if you are going to own pets, clutter free is best, that way there is less to be knocked over.
Ideally, you’ll have a pantry in the kitchen where you can store your pet’s food. This way, you can keep it hidden instead of having to either display it or go out into your garage each time you feed your pets.
Check back soon for part three of this blog.
This blog is brought to you by rehab jobs.
read more "Decorate Beautifully AND Have Pets – Part Two"

Don’t use flat finish paint if you have pets. When they rub against the walls (or run into the walls as my dogs sometimes do) it will be harder to clean flat finish painted walls. It is best to avoid white walls if you can. This will force you to think about your style a little bit more, and your home will probably end up looking better if you paint them colors other than white.
Your tables and end tables will need to be sturdy. Where you have animals you’ll have play and they’ll inevitably run into your furniture. Also, keeping a lot of knick knacks on your tables probably won’t work well if you are going to own pets, clutter free is best, that way there is less to be knocked over.
Ideally, you’ll have a pantry in the kitchen where you can store your pet’s food. This way, you can keep it hidden instead of having to either display it or go out into your garage each time you feed your pets.
Check back soon for part three of this blog.
This blog is brought to you by rehab jobs.
Decorate Beautifully AND Have Pets – Part Two
Pick your color scheme carefully if you have pets or anticipate having them soon. Stay away from white carpeting, curtains, or furniture, they won’t be white for long if you own pets. Black fabric and upholstery shows light animal fur really well, and it can be hard to keep it all cleaned off, so try not to use very much black in your decorating. Bold or bright colors also show fur easily. The best colors for us animal lovers are soft neutrals, any color within the range from light tan to chocolate brown will stay looking nice with pets fairly well.
Don’t use flat finish paint if you have pets. When they rub against the walls (or run into the walls as my dogs sometimes do) it will be harder to clean flat finish painted walls. It is best to avoid white walls if you can. This will force you to think about your style a little bit more, and your home will probably end up looking better if you paint them colors other than white.
Your tables and end tables will need to be sturdy. Where you have animals you’ll have play and they’ll inevitably run into your furniture. Also, keeping a lot of knick knacks on your tables probably won’t work well if you are going to own pets, clutter free is best, that way there is less to be knocked over.
Ideally, you’ll have a pantry in the kitchen where you can store your pet’s food. This way, you can keep it hidden instead of having to either display it or go out into your garage each time you feed your pets.
Check back soon for part three of this blog.
This blog is brought to you by rehab jobs.
read more "Decorate Beautifully AND Have Pets – Part Two"
Don’t use flat finish paint if you have pets. When they rub against the walls (or run into the walls as my dogs sometimes do) it will be harder to clean flat finish painted walls. It is best to avoid white walls if you can. This will force you to think about your style a little bit more, and your home will probably end up looking better if you paint them colors other than white.
Your tables and end tables will need to be sturdy. Where you have animals you’ll have play and they’ll inevitably run into your furniture. Also, keeping a lot of knick knacks on your tables probably won’t work well if you are going to own pets, clutter free is best, that way there is less to be knocked over.
Ideally, you’ll have a pantry in the kitchen where you can store your pet’s food. This way, you can keep it hidden instead of having to either display it or go out into your garage each time you feed your pets.
Check back soon for part three of this blog.
This blog is brought to you by rehab jobs.
Third time is a charm?
I'm on drapery No. 3 in our dining room. And I think I'm finally happy...but not done yet! More about that later. First, another short TOOT on drapery-making on the cheap:Let's review. Hemming tape: (Have you gotten some yet?? I mean, reallllllly...)Put your good side of the fabric against the lining and hem. Do I have to remind you how easy this is??If you are just doing simple drapes, just
read more "Third time is a charm?"
Decorate Beautifully AND Have Pets – Part One
I’m an animal lover and live with two dogs and two cats, but that doesn’t mean my house has to look worse for the wear. Sticking to a few rules when decorating your home can allow you to have a home that looks good and pets simultaneously. In fact, a home that is decorated to be durable and stylish may reduce your stress levels when guests or kids are over, you won’t have to worry about messes as much.

Stay away from decorating in fabric types that attract hair. If a fabric has any tendency to have static, it will attract animal hair like crazy. Velvet is another fabric to steer clear of, you will have a hard time keeping velvet hair free. Certain fabric types like microfiber are easy to keep fur off of. Ideally, you would choose fabrics that are close to the color of your pet’s hair to minimize visible fur on the fabric. There is a new fabric type called crypton, designed to resist stains and smells. It comes in many colors and styles and you can check it out at www.cryptonfabric.com. Leather is a good fabric choice for pet owners too. It is easy to clean and very durable. Pleather will work well too. Ultrasuede feels like real suede and is very good for pet owners too.
Check back soon for part two of this blog.
This blog is brought to you by dialysis nuring jobs.
read more "Decorate Beautifully AND Have Pets – Part One"

Stay away from decorating in fabric types that attract hair. If a fabric has any tendency to have static, it will attract animal hair like crazy. Velvet is another fabric to steer clear of, you will have a hard time keeping velvet hair free. Certain fabric types like microfiber are easy to keep fur off of. Ideally, you would choose fabrics that are close to the color of your pet’s hair to minimize visible fur on the fabric. There is a new fabric type called crypton, designed to resist stains and smells. It comes in many colors and styles and you can check it out at www.cryptonfabric.com. Leather is a good fabric choice for pet owners too. It is easy to clean and very durable. Pleather will work well too. Ultrasuede feels like real suede and is very good for pet owners too.
Check back soon for part two of this blog.
This blog is brought to you by dialysis nuring jobs.
Decorate Beautifully AND Have Pets – Part One
I’m an animal lover and live with two dogs and two cats, but that doesn’t mean my house has to look worse for the wear. Sticking to a few rules when decorating your home can allow you to have a home that looks good and pets simultaneously. In fact, a home that is decorated to be durable and stylish may reduce your stress levels when guests or kids are over, you won’t have to worry about messes as much.
Stay away from decorating in fabric types that attract hair. If a fabric has any tendency to have static, it will attract animal hair like crazy. Velvet is another fabric to steer clear of, you will have a hard time keeping velvet hair free. Certain fabric types like microfiber are easy to keep fur off of. Ideally, you would choose fabrics that are close to the color of your pet’s hair to minimize visible fur on the fabric. There is a new fabric type called crypton, designed to resist stains and smells. It comes in many colors and styles and you can check it out at www.cryptonfabric.com. Leather is a good fabric choice for pet owners too. It is easy to clean and very durable. Pleather will work well too. Ultrasuede feels like real suede and is very good for pet owners too.
Check back soon for part two of this blog.
This blog is brought to you by dialysis nuring jobs.
read more "Decorate Beautifully AND Have Pets – Part One"
Stay away from decorating in fabric types that attract hair. If a fabric has any tendency to have static, it will attract animal hair like crazy. Velvet is another fabric to steer clear of, you will have a hard time keeping velvet hair free. Certain fabric types like microfiber are easy to keep fur off of. Ideally, you would choose fabrics that are close to the color of your pet’s hair to minimize visible fur on the fabric. There is a new fabric type called crypton, designed to resist stains and smells. It comes in many colors and styles and you can check it out at www.cryptonfabric.com. Leather is a good fabric choice for pet owners too. It is easy to clean and very durable. Pleather will work well too. Ultrasuede feels like real suede and is very good for pet owners too.
Check back soon for part two of this blog.
This blog is brought to you by dialysis nuring jobs.
My poor Bub.
Just wanted to leave a quick note tonight -- would love some thoughts and prayers for our sweet Boy. Nothing too serious, but he's in a whole lot of pain. We were with family tonight...kids were playing...long story short...our Bub got checked big time by a much older kiddo (by accident of course).We soon realized it was serious, went to the ER and he has a fractured clavicle bone. Should heal in
read more "My poor Bub."
An announcement and a few things
Well, I am completely humbled by all your sweet comments on my laundry room. You all know how to make a girl feel good about herself, really. :) I am SO thrilled when I hear that I have inspired you. That is what I'm here for and why I started this blog!!Also, so glad you like the new background. Dunce that I am, I finally figured out how to change it! And the little ghosts and bat (aren't they
read more "An announcement and a few things"
Pumpkin Carving – Part Four
There are special pumpkin carving kits available at many stores. These kits are a lot easier to use for carving than knives that you happen to have around the kitchen, and a decent kit can usually be found for a good price. Kits usually include tiny serrated blades in several different sizes that make cutting intricate patterns easy. If you intend to really get into carving the details, having a drill on hand can make your task easier.

Candles look the most authentic inside carved pumpkins that are displayed, but the heat from the candles often causes pumpkins to shrivel and age prematurely. To prevent this, consider buying some lights meant to go inside of pumpkins. You can get lights that have tiny batteries in them so you don’t have to worry about finding an outlet. You can also get lights that flicker to look like a candle flame. These don’t usually cost more than a dollar per light, and they’re easier than candles too since you can leave them on instead of having to remember to light and blow out the candle each night.
There are a few unique things you can do with your pumpkin if you want it to stand out. You can put wax paper inside the pumpkin covering the design, this will create an opaque look when the pumpkin is lit. Tin foil inside the pumpkin across from the pattern makes the light emitted from the pumpkin look brighter.
Check back soon for part four of this blog.
This blog is brought to you by occupational therapy jobs.
read more "Pumpkin Carving – Part Four"

Candles look the most authentic inside carved pumpkins that are displayed, but the heat from the candles often causes pumpkins to shrivel and age prematurely. To prevent this, consider buying some lights meant to go inside of pumpkins. You can get lights that have tiny batteries in them so you don’t have to worry about finding an outlet. You can also get lights that flicker to look like a candle flame. These don’t usually cost more than a dollar per light, and they’re easier than candles too since you can leave them on instead of having to remember to light and blow out the candle each night.
There are a few unique things you can do with your pumpkin if you want it to stand out. You can put wax paper inside the pumpkin covering the design, this will create an opaque look when the pumpkin is lit. Tin foil inside the pumpkin across from the pattern makes the light emitted from the pumpkin look brighter.
Check back soon for part four of this blog.
This blog is brought to you by occupational therapy jobs.
Pumpkin Carving – Part Four
There are special pumpkin carving kits available at many stores. These kits are a lot easier to use for carving than knives that you happen to have around the kitchen, and a decent kit can usually be found for a good price. Kits usually include tiny serrated blades in several different sizes that make cutting intricate patterns easy. If you intend to really get into carving the details, having a drill on hand can make your task easier.
Candles look the most authentic inside carved pumpkins that are displayed, but the heat from the candles often causes pumpkins to shrivel and age prematurely. To prevent this, consider buying some lights meant to go inside of pumpkins. You can get lights that have tiny batteries in them so you don’t have to worry about finding an outlet. You can also get lights that flicker to look like a candle flame. These don’t usually cost more than a dollar per light, and they’re easier than candles too since you can leave them on instead of having to remember to light and blow out the candle each night.
There are a few unique things you can do with your pumpkin if you want it to stand out. You can put wax paper inside the pumpkin covering the design, this will create an opaque look when the pumpkin is lit. Tin foil inside the pumpkin across from the pattern makes the light emitted from the pumpkin look brighter.
Check back soon for part four of this blog.
This blog is brought to you by occupational therapy jobs.
read more "Pumpkin Carving – Part Four"
Candles look the most authentic inside carved pumpkins that are displayed, but the heat from the candles often causes pumpkins to shrivel and age prematurely. To prevent this, consider buying some lights meant to go inside of pumpkins. You can get lights that have tiny batteries in them so you don’t have to worry about finding an outlet. You can also get lights that flicker to look like a candle flame. These don’t usually cost more than a dollar per light, and they’re easier than candles too since you can leave them on instead of having to remember to light and blow out the candle each night.
There are a few unique things you can do with your pumpkin if you want it to stand out. You can put wax paper inside the pumpkin covering the design, this will create an opaque look when the pumpkin is lit. Tin foil inside the pumpkin across from the pattern makes the light emitted from the pumpkin look brighter.
Check back soon for part four of this blog.
This blog is brought to you by occupational therapy jobs.
Spray paint finger.
Does anyone have a cure for the pain of spray painting? I have spray painted SO MANY THINGS over the past five days, I've lost count. I even had to sleep with a heating pad wrapped around my arm one night. Not kidding.So I was trying not to spend any money last weekend, (STOP laughing, I'm for real!), so I figured I'd do a few things in our laundry/mud room. A few things turned into about 25, but
read more "Spray paint finger."
Pumpkin Carving – Part Three
Drilling holes where you will need to start each cut will make carving easier. This way, the hard work is done, and you have a nice starting point for each cut. Make sure you make the most of your carving tools by sawing with them, this is how they are meant to be used. Pumpkin carving is time consuming; expect to spend awhile on this project if you want it to look good when you are done. Pay close attention to your pattern as you cut, you don’t want to end up losing track of the final goal and accidentally sawing off a vital connector area.

When the hard work of carving the pumpkin is done, you might want to spend a few minutes working to make it last as long as possible. Place the pumpkin in a tub full of cold water, let the pumpkin fill with water and sink. Let it soak for at least a couple of hours. Add a little bleach to the tub of water to help prevent molding. This process sounds strange, but it works to firm up the pumpkin. When you remove the pumpkin from the water, let it dry off and then rub Vaseline along any cut edges. This traps the water in the pumpkin, which is what you want, because when water escapes this is what causes pumpkins to shrivel.
Check back soon for part four of this blog.
This blog is brought to you by dialysis jobs.
read more "Pumpkin Carving – Part Three"

When the hard work of carving the pumpkin is done, you might want to spend a few minutes working to make it last as long as possible. Place the pumpkin in a tub full of cold water, let the pumpkin fill with water and sink. Let it soak for at least a couple of hours. Add a little bleach to the tub of water to help prevent molding. This process sounds strange, but it works to firm up the pumpkin. When you remove the pumpkin from the water, let it dry off and then rub Vaseline along any cut edges. This traps the water in the pumpkin, which is what you want, because when water escapes this is what causes pumpkins to shrivel.
Check back soon for part four of this blog.
This blog is brought to you by dialysis jobs.
Pumpkin Carving – Part Three
Drilling holes where you will need to start each cut will make carving easier. This way, the hard work is done, and you have a nice starting point for each cut. Make sure you make the most of your carving tools by sawing with them, this is how they are meant to be used. Pumpkin carving is time consuming; expect to spend awhile on this project if you want it to look good when you are done. Pay close attention to your pattern as you cut, you don’t want to end up losing track of the final goal and accidentally sawing off a vital connector area.
When the hard work of carving the pumpkin is done, you might want to spend a few minutes working to make it last as long as possible. Place the pumpkin in a tub full of cold water, let the pumpkin fill with water and sink. Let it soak for at least a couple of hours. Add a little bleach to the tub of water to help prevent molding. This process sounds strange, but it works to firm up the pumpkin. When you remove the pumpkin from the water, let it dry off and then rub Vaseline along any cut edges. This traps the water in the pumpkin, which is what you want, because when water escapes this is what causes pumpkins to shrivel.
Check back soon for part four of this blog.
This blog is brought to you by dialysis jobs.
read more "Pumpkin Carving – Part Three"
When the hard work of carving the pumpkin is done, you might want to spend a few minutes working to make it last as long as possible. Place the pumpkin in a tub full of cold water, let the pumpkin fill with water and sink. Let it soak for at least a couple of hours. Add a little bleach to the tub of water to help prevent molding. This process sounds strange, but it works to firm up the pumpkin. When you remove the pumpkin from the water, let it dry off and then rub Vaseline along any cut edges. This traps the water in the pumpkin, which is what you want, because when water escapes this is what causes pumpkins to shrivel.
Check back soon for part four of this blog.
This blog is brought to you by dialysis jobs.
Have you been BOOED?
Our neighborhood does this little tradition every year, and it's one of those little things about the holidays that I love. This year no one has started it yet, so I gathered the goodies and the Bub and I pulled it together tonight. If you haven't done this, you'll need some gift bags, candy, and your printer. This time I used this little poem:The air is cool, the season fall,Soon Halloween will
read more "Have you been BOOED?"
Pumpkin Carving – Part Two
Projection kits have gotten popular for pumpkins lately. To project the pattern from the pumpkin onto a wall you’ll want to carve a small pattern into the pumpkin. You also need to carve it backwards if there is any text involved, so it will project the correct direction when you are done.
Pumpkin carving can be as intricate of a process as you would like it to be depending on how complicated the pattern you select is. Many people carve a basic pattern, which will yield black where no pumpkin is carved away, and bright yellow where the carving has been done and the candle shows through. There are two other shades that can be achieved with careful carving though. The first is light orange, which will show through if you carve away all of the skin off of the front of the pumpkin and some of the meat, the more you carve, the lighter the orange will look. Dark orange will show through if you remove the pumpkin meat from the inside, leaving the skin alone on the front side.

Once you pick out a pattern that you like, you will need to transfer it to the pumpkin. First, tape or pin the pattern to the pumpkin. You can push a thumb tack through the paper along the patterns lines, you’ll need a lot of holes to see the pattern clearly. This is a lot of work, but it will be worth it when you are done and you don’t have to guess where to carve any of your lines.
Check back soon for part three of this blog.
This blog is brought to you by physical therapy jobs.
read more "Pumpkin Carving – Part Two"
Pumpkin carving can be as intricate of a process as you would like it to be depending on how complicated the pattern you select is. Many people carve a basic pattern, which will yield black where no pumpkin is carved away, and bright yellow where the carving has been done and the candle shows through. There are two other shades that can be achieved with careful carving though. The first is light orange, which will show through if you carve away all of the skin off of the front of the pumpkin and some of the meat, the more you carve, the lighter the orange will look. Dark orange will show through if you remove the pumpkin meat from the inside, leaving the skin alone on the front side.

Once you pick out a pattern that you like, you will need to transfer it to the pumpkin. First, tape or pin the pattern to the pumpkin. You can push a thumb tack through the paper along the patterns lines, you’ll need a lot of holes to see the pattern clearly. This is a lot of work, but it will be worth it when you are done and you don’t have to guess where to carve any of your lines.
Check back soon for part three of this blog.
This blog is brought to you by physical therapy jobs.
Pumpkin Carving – Part Two
Projection kits have gotten popular for pumpkins lately. To project the pattern from the pumpkin onto a wall you’ll want to carve a small pattern into the pumpkin. You also need to carve it backwards if there is any text involved, so it will project the correct direction when you are done.
Pumpkin carving can be as intricate of a process as you would like it to be depending on how complicated the pattern you select is. Many people carve a basic pattern, which will yield black where no pumpkin is carved away, and bright yellow where the carving has been done and the candle shows through. There are two other shades that can be achieved with careful carving though. The first is light orange, which will show through if you carve away all of the skin off of the front of the pumpkin and some of the meat, the more you carve, the lighter the orange will look. Dark orange will show through if you remove the pumpkin meat from the inside, leaving the skin alone on the front side.
Once you pick out a pattern that you like, you will need to transfer it to the pumpkin. First, tape or pin the pattern to the pumpkin. You can push a thumb tack through the paper along the patterns lines, you’ll need a lot of holes to see the pattern clearly. This is a lot of work, but it will be worth it when you are done and you don’t have to guess where to carve any of your lines.
Check back soon for part three of this blog.
This blog is brought to you by physical therapy jobs.
read more "Pumpkin Carving – Part Two"
Pumpkin carving can be as intricate of a process as you would like it to be depending on how complicated the pattern you select is. Many people carve a basic pattern, which will yield black where no pumpkin is carved away, and bright yellow where the carving has been done and the candle shows through. There are two other shades that can be achieved with careful carving though. The first is light orange, which will show through if you carve away all of the skin off of the front of the pumpkin and some of the meat, the more you carve, the lighter the orange will look. Dark orange will show through if you remove the pumpkin meat from the inside, leaving the skin alone on the front side.
Once you pick out a pattern that you like, you will need to transfer it to the pumpkin. First, tape or pin the pattern to the pumpkin. You can push a thumb tack through the paper along the patterns lines, you’ll need a lot of holes to see the pattern clearly. This is a lot of work, but it will be worth it when you are done and you don’t have to guess where to carve any of your lines.
Check back soon for part three of this blog.
This blog is brought to you by physical therapy jobs.
Things that make you go hmmmm...
How does this:Become this:In less than five minutes? But it takes about twenty to clean it up? And the bigger question -- why do I continue to clean it? What's that definition of insanity again?
read more "Things that make you go hmmmm..."
Pumpkin Carving – Part One
If you haven’t carved a pumpkin yet for Halloween never fear, you still have plenty of time. Even if you don’t have kids, carving a pumpkin can be a lot of fun. There is an endless supply of pattern ideas available for free on the Internet, or get creative and create your own pumpkin design.

Choosing the perfect pumpkin is very important. There are lots of shapes available, you might want a tall oval shaped pumpkin if you envision carving the long faced Frankenstein, or you might want a short wide pumpkin if you want to carve a bat with wings outstretched. There is no perfect shape for all patterns, but you can find perfect shapes if you pick out your pattern first. A pumpkin with a sturdy stem is a sign of a health pumpkin and it will also make lifting the lid off of the carved pumpkin to insert candles a lot easier.
It may seem easy to prep the pumpkin for carving, but there are a few key things to do correctly during this process. Most importantly, when carving off the lid, make sure you carve at an angle in a cone shape. If you carve straight down your lid will just fall into your pumpkin, so this is crucial. The rest of the preparation is pretty simple, just remove the seeds and pulp and you’re ready to go.
Check back soon for part two of this blog.
This blog is brought to you by physician staffing.
read more "Pumpkin Carving – Part One"

Choosing the perfect pumpkin is very important. There are lots of shapes available, you might want a tall oval shaped pumpkin if you envision carving the long faced Frankenstein, or you might want a short wide pumpkin if you want to carve a bat with wings outstretched. There is no perfect shape for all patterns, but you can find perfect shapes if you pick out your pattern first. A pumpkin with a sturdy stem is a sign of a health pumpkin and it will also make lifting the lid off of the carved pumpkin to insert candles a lot easier.
It may seem easy to prep the pumpkin for carving, but there are a few key things to do correctly during this process. Most importantly, when carving off the lid, make sure you carve at an angle in a cone shape. If you carve straight down your lid will just fall into your pumpkin, so this is crucial. The rest of the preparation is pretty simple, just remove the seeds and pulp and you’re ready to go.
Check back soon for part two of this blog.
This blog is brought to you by physician staffing.
Pumpkin Carving – Part One
If you haven’t carved a pumpkin yet for Halloween never fear, you still have plenty of time. Even if you don’t have kids, carving a pumpkin can be a lot of fun. There is an endless supply of pattern ideas available for free on the Internet, or get creative and create your own pumpkin design.
Choosing the perfect pumpkin is very important. There are lots of shapes available, you might want a tall oval shaped pumpkin if you envision carving the long faced Frankenstein, or you might want a short wide pumpkin if you want to carve a bat with wings outstretched. There is no perfect shape for all patterns, but you can find perfect shapes if you pick out your pattern first. A pumpkin with a sturdy stem is a sign of a health pumpkin and it will also make lifting the lid off of the carved pumpkin to insert candles a lot easier.
It may seem easy to prep the pumpkin for carving, but there are a few key things to do correctly during this process. Most importantly, when carving off the lid, make sure you carve at an angle in a cone shape. If you carve straight down your lid will just fall into your pumpkin, so this is crucial. The rest of the preparation is pretty simple, just remove the seeds and pulp and you’re ready to go.
Check back soon for part two of this blog.
This blog is brought to you by physician staffing.
read more "Pumpkin Carving – Part One"
Choosing the perfect pumpkin is very important. There are lots of shapes available, you might want a tall oval shaped pumpkin if you envision carving the long faced Frankenstein, or you might want a short wide pumpkin if you want to carve a bat with wings outstretched. There is no perfect shape for all patterns, but you can find perfect shapes if you pick out your pattern first. A pumpkin with a sturdy stem is a sign of a health pumpkin and it will also make lifting the lid off of the carved pumpkin to insert candles a lot easier.
It may seem easy to prep the pumpkin for carving, but there are a few key things to do correctly during this process. Most importantly, when carving off the lid, make sure you carve at an angle in a cone shape. If you carve straight down your lid will just fall into your pumpkin, so this is crucial. The rest of the preparation is pretty simple, just remove the seeds and pulp and you’re ready to go.
Check back soon for part two of this blog.
This blog is brought to you by physician staffing.
More about me and nap time for you.
OK, so I guess one of these wasn't really an award, I was tagged. I was still super excited though, so I'm going to say it was an award. Alrighty? OK.So Suzi over at Pink Vanilla Cupcakes tagged me and this is what I have to do:Link to the person who tagged you and post the rules in your post.Share 7 random/weird facts about yourself.Tag 7 random people at the end of your blog and link to their
read more "More about me and nap time for you."
Decorate Your Home for a Halloween Party - Part Two
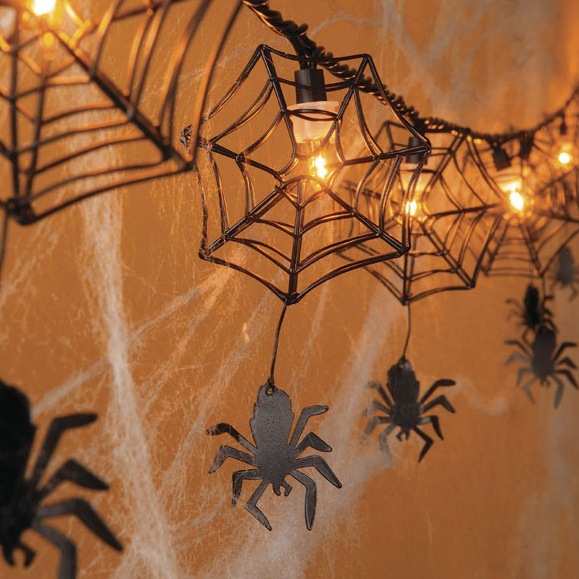
Fake spider webs are extremely cheap. You can use cotton batting if you prefer, artfully draped around your house. Make sure to buy a few fake spiders and bugs to add to your display.

Cut out a shape like a bat or a skull in black construction paper. Tape it onto a flashlight and shine the light towards a noticeable wall. This will cast a shadow in the shape of your cutout that will be a unique decoration.
Scary sound effects are easy to provide, as they are available on CD at many stores. If you place them in an entry way you might be able to surprise your guests.
Switch out some of your regular light bulbs with orange, yellow, or black bulbs for a dimmer spookier look.
A coffin can be built out of a wood frame and used for a variety of purposes. You could put a dummy inside with an arm hanging out. You could put cold drinks in coolers inside. Use your imagination here.
Scarecrows are a common fall decoration for your yard that will look good for a Halloween party.
Grave stones are definitely creepy inscribed with RIP. You can buy them, or you can cut out grey tombstones from construction paper and tape them to a wall so it looks like a silhouette of a grave yard.
Dry ice can be purchased fairly inexpensively and added to punch for a foggy atmosphere. Fog machines will do the same thing, but they’re a little more expensive.
This blog is brought to you by dialysis nursing jobs.
read more "Decorate Your Home for a Halloween Party - Part Two"
Cut out a shape like a bat or a skull in black construction paper. Tape it onto a flashlight and shine the light towards a noticeable wall. This will cast a shadow in the shape of your cutout that will be a unique decoration.
Scary sound effects are easy to provide, as they are available on CD at many stores. If you place them in an entry way you might be able to surprise your guests.
Switch out some of your regular light bulbs with orange, yellow, or black bulbs for a dimmer spookier look.
A coffin can be built out of a wood frame and used for a variety of purposes. You could put a dummy inside with an arm hanging out. You could put cold drinks in coolers inside. Use your imagination here.
Scarecrows are a common fall decoration for your yard that will look good for a Halloween party.
Grave stones are definitely creepy inscribed with RIP. You can buy them, or you can cut out grey tombstones from construction paper and tape them to a wall so it looks like a silhouette of a grave yard.
Dry ice can be purchased fairly inexpensively and added to punch for a foggy atmosphere. Fog machines will do the same thing, but they’re a little more expensive.
This blog is brought to you by dialysis nursing jobs.
Decorate Your Home for a Halloween Party - Part Two
Fake spider webs are extremely cheap. You can use cotton batting if you prefer, artfully draped around your house. Make sure to buy a few fake spiders and bugs to add to your display.
Cut out a shape like a bat or a skull in black construction paper. Tape it onto a flashlight and shine the light towards a noticeable wall. This will cast a shadow in the shape of your cutout that will be a unique decoration.
Scary sound effects are easy to provide, as they are available on CD at many stores. If you place them in an entry way you might be able to surprise your guests.
Switch out some of your regular light bulbs with orange, yellow, or black bulbs for a dimmer spookier look.
A coffin can be built out of a wood frame and used for a variety of purposes. You could put a dummy inside with an arm hanging out. You could put cold drinks in coolers inside. Use your imagination here.
Scarecrows are a common fall decoration for your yard that will look good for a Halloween party.
Grave stones are definitely creepy inscribed with RIP. You can buy them, or you can cut out grey tombstones from construction paper and tape them to a wall so it looks like a silhouette of a grave yard.
Dry ice can be purchased fairly inexpensively and added to punch for a foggy atmosphere. Fog machines will do the same thing, but they’re a little more expensive.
This blog is brought to you by dialysis nursing jobs.
read more "Decorate Your Home for a Halloween Party - Part Two"
Cut out a shape like a bat or a skull in black construction paper. Tape it onto a flashlight and shine the light towards a noticeable wall. This will cast a shadow in the shape of your cutout that will be a unique decoration.
Scary sound effects are easy to provide, as they are available on CD at many stores. If you place them in an entry way you might be able to surprise your guests.
Switch out some of your regular light bulbs with orange, yellow, or black bulbs for a dimmer spookier look.
A coffin can be built out of a wood frame and used for a variety of purposes. You could put a dummy inside with an arm hanging out. You could put cold drinks in coolers inside. Use your imagination here.
Scarecrows are a common fall decoration for your yard that will look good for a Halloween party.
Grave stones are definitely creepy inscribed with RIP. You can buy them, or you can cut out grey tombstones from construction paper and tape them to a wall so it looks like a silhouette of a grave yard.
Dry ice can be purchased fairly inexpensively and added to punch for a foggy atmosphere. Fog machines will do the same thing, but they’re a little more expensive.
This blog is brought to you by dialysis nursing jobs.
I DO heart you!
Iron work. I can't get enough of it. I'm not crazy about traditional art so I love using iron pieces throughout our home. And it's SO cheap compared to art, especially if you're trying to fill a large space. I know I've shown some to you here. But I went around taking pictures today and realized I have it EVERYWHERE! Yikes!In our bathroom:In the "potty" room: Above the bed:Half wall: I got this
read more "I DO heart you!"
Decorate Your Home for a Halloween Party – Part One
If you are having a Halloween party this year make sure to decorate your home to get the guests into the spirit. There are plenty of decoration ideas, choose one or all of them for your party. Most of the materials required for these ideas can be acquired from a discount or party store.
Having a few jack o’ lanterns displayed on your front porch or around the house are vital. Carving pumpkins can be a lot of fun for you and especially for kids. There are hundreds of printable stencils available on the internet for free. If you aren’t into carving you can always paint a design on your pumpkin instead.

Candles displayed inside of the jack o’ lanterns will give the faces or designs the appropriate eerie Halloween glow. You can get dark candles and scary looking candle holders to display randomly around your house too.
Crepe paper can add a little fun to your home in Halloween colors. It is cheap and easy to decorate with. Use it as a border around the table where you are planning to have your Halloween treats displayed.
Fake blood is a creepy touch that can be easily added. You can even make your own fake blood using corn syrup, food coloring, and a touch of milk to make the blood look darker and thicker. It can be very messy of course and will stain, so use with caution. Fake blood might best be used outdoors where you won’t have to worry about it getting on your carpet and furniture.
This blog is brought to you by rehab jobs.
read more "Decorate Your Home for a Halloween Party – Part One"
Having a few jack o’ lanterns displayed on your front porch or around the house are vital. Carving pumpkins can be a lot of fun for you and especially for kids. There are hundreds of printable stencils available on the internet for free. If you aren’t into carving you can always paint a design on your pumpkin instead.

Candles displayed inside of the jack o’ lanterns will give the faces or designs the appropriate eerie Halloween glow. You can get dark candles and scary looking candle holders to display randomly around your house too.
Crepe paper can add a little fun to your home in Halloween colors. It is cheap and easy to decorate with. Use it as a border around the table where you are planning to have your Halloween treats displayed.
Fake blood is a creepy touch that can be easily added. You can even make your own fake blood using corn syrup, food coloring, and a touch of milk to make the blood look darker and thicker. It can be very messy of course and will stain, so use with caution. Fake blood might best be used outdoors where you won’t have to worry about it getting on your carpet and furniture.
This blog is brought to you by rehab jobs.
Decorate Your Home for a Halloween Party – Part One
If you are having a Halloween party this year make sure to decorate your home to get the guests into the spirit. There are plenty of decoration ideas, choose one or all of them for your party. Most of the materials required for these ideas can be acquired from a discount or party store.
Having a few jack o’ lanterns displayed on your front porch or around the house are vital. Carving pumpkins can be a lot of fun for you and especially for kids. There are hundreds of printable stencils available on the internet for free. If you aren’t into carving you can always paint a design on your pumpkin instead.
Candles displayed inside of the jack o’ lanterns will give the faces or designs the appropriate eerie Halloween glow. You can get dark candles and scary looking candle holders to display randomly around your house too.
Crepe paper can add a little fun to your home in Halloween colors. It is cheap and easy to decorate with. Use it as a border around the table where you are planning to have your Halloween treats displayed.
Fake blood is a creepy touch that can be easily added. You can even make your own fake blood using corn syrup, food coloring, and a touch of milk to make the blood look darker and thicker. It can be very messy of course and will stain, so use with caution. Fake blood might best be used outdoors where you won’t have to worry about it getting on your carpet and furniture.
This blog is brought to you by rehab jobs.
read more "Decorate Your Home for a Halloween Party – Part One"
Having a few jack o’ lanterns displayed on your front porch or around the house are vital. Carving pumpkins can be a lot of fun for you and especially for kids. There are hundreds of printable stencils available on the internet for free. If you aren’t into carving you can always paint a design on your pumpkin instead.
Candles displayed inside of the jack o’ lanterns will give the faces or designs the appropriate eerie Halloween glow. You can get dark candles and scary looking candle holders to display randomly around your house too.
Crepe paper can add a little fun to your home in Halloween colors. It is cheap and easy to decorate with. Use it as a border around the table where you are planning to have your Halloween treats displayed.
Fake blood is a creepy touch that can be easily added. You can even make your own fake blood using corn syrup, food coloring, and a touch of milk to make the blood look darker and thicker. It can be very messy of course and will stain, so use with caution. Fake blood might best be used outdoors where you won’t have to worry about it getting on your carpet and furniture.
This blog is brought to you by rehab jobs.
I don't heart you
ugly brass knobs, you. Ugh.Or you, one-handled faucets that have lime all over them from before we got a softener and I don't heart you because I can only replace you with another one-handled faucet...Please, just shield your eyes...You, you silly faucet that's waaaaay too short and I bang pans into you every. day. And yes, even you, ugly light fixture in our closet. (Yes, I want to replace the
read more "I don't heart you"
Dress your Home for Fall – Part Four
Decorating your front stairs for fall can look nice. Just make sure to leave enough walking space. Use potted mums or evergreen plants surrounded by pumpkins and gourds. Rusty pots make good planters for this display, but terra cotta pots will work too. If you carve pumpkins, use your carved pumpkins here, this display will look awesome lit up with your jack o’ lantern.

If you have a bench in your front yard, don’t forget to dress it up like you did your porch.
Inside the home it is important to decorate for fall too. If you have a fireplace, take advantage of it by placing pumpkins, carved is best, one or two on each side of the fireplace. Fireplace mantles also look great decorated for wall with candles, leaves, and mini pumpkins.
There are fake pumpkins that you can buy at a craft store that will last for years. They can even be carved just like a real pumpkin.
Most of the decorating ideas in this and the past three blogs before it can be mixed and matched. Have fun with these projects and let your creative side come out. Be careful not to go overboard with your fall decorating. It can look silly to decorate every available surface in your home, and it will be quite time consuming to do so also. Make sure that wherever you stand in your home you can only see one of two fall decorations at a time.
read more "Dress your Home for Fall – Part Four"

If you have a bench in your front yard, don’t forget to dress it up like you did your porch.
Inside the home it is important to decorate for fall too. If you have a fireplace, take advantage of it by placing pumpkins, carved is best, one or two on each side of the fireplace. Fireplace mantles also look great decorated for wall with candles, leaves, and mini pumpkins.
There are fake pumpkins that you can buy at a craft store that will last for years. They can even be carved just like a real pumpkin.
Most of the decorating ideas in this and the past three blogs before it can be mixed and matched. Have fun with these projects and let your creative side come out. Be careful not to go overboard with your fall decorating. It can look silly to decorate every available surface in your home, and it will be quite time consuming to do so also. Make sure that wherever you stand in your home you can only see one of two fall decorations at a time.
This blog is brought to you by physical therapy jobs.
Dress your Home for Fall – Part Four
Decorating your front stairs for fall can look nice. Just make sure to leave enough walking space. Use potted mums or evergreen plants surrounded by pumpkins and gourds. Rusty pots make good planters for this display, but terra cotta pots will work too. If you carve pumpkins, use your carved pumpkins here, this display will look awesome lit up with your jack o’ lantern.
If you have a bench in your front yard, don’t forget to dress it up like you did your porch.
Inside the home it is important to decorate for fall too. If you have a fireplace, take advantage of it by placing pumpkins, carved is best, one or two on each side of the fireplace. Fireplace mantles also look great decorated for wall with candles, leaves, and mini pumpkins.
There are fake pumpkins that you can buy at a craft store that will last for years. They can even be carved just like a real pumpkin.
Most of the decorating ideas in this and the past three blogs before it can be mixed and matched. Have fun with these projects and let your creative side come out. Be careful not to go overboard with your fall decorating. It can look silly to decorate every available surface in your home, and it will be quite time consuming to do so also. Make sure that wherever you stand in your home you can only see one of two fall decorations at a time.
read more "Dress your Home for Fall – Part Four"
If you have a bench in your front yard, don’t forget to dress it up like you did your porch.
Inside the home it is important to decorate for fall too. If you have a fireplace, take advantage of it by placing pumpkins, carved is best, one or two on each side of the fireplace. Fireplace mantles also look great decorated for wall with candles, leaves, and mini pumpkins.
There are fake pumpkins that you can buy at a craft store that will last for years. They can even be carved just like a real pumpkin.
Most of the decorating ideas in this and the past three blogs before it can be mixed and matched. Have fun with these projects and let your creative side come out. Be careful not to go overboard with your fall decorating. It can look silly to decorate every available surface in your home, and it will be quite time consuming to do so also. Make sure that wherever you stand in your home you can only see one of two fall decorations at a time.
This blog is brought to you by physical therapy jobs.
Dress your Home for Fall – Part Three
Get a plate in a warm color such as red, yellow, or orange. Gold looks great for this accessory if you can find it. Hot glue artificial leaves around the edge of the plate. Make sure they overlap each other. This can be used as a candle display, as placing two or three pillar candles on it will look lovely. You can do this with a smaller plate too, and just use it to display one pillar candle.

The front door of your home is a popular place to put your Fall decorations. I’m going to do a separate blog about wreaths, but there are several cute alternatives if you aren’t into wreaths.
You can find old picture that is framed at the thrift store or at a yard sale for very cheap. Hot acorns, pinecones, and artificial berries and leaves randomly all over the picture and frame, completely covering them. Finish it off by hot gluing a big bow on your decoration, this looks nice in one corner, but would look good right in the center too. Make sure the ribbon is in a fall color.
An old rake that you won’t use again can be transformed into another door decoration. Hot glue artificial leaves, feathers, and fall grasses to the rake like a bouquet and tie it off with a big ribbon.
Old crates can be found for very cheap or even free and they look great as an outside fall decoration. Place a few of them on your porch, stacking them if you want. Then, sprinkle various sizes of pumpkins and gourds inside and on top of them for a quick porch decoration.
read more "Dress your Home for Fall – Part Three"

The front door of your home is a popular place to put your Fall decorations. I’m going to do a separate blog about wreaths, but there are several cute alternatives if you aren’t into wreaths.
You can find old picture that is framed at the thrift store or at a yard sale for very cheap. Hot acorns, pinecones, and artificial berries and leaves randomly all over the picture and frame, completely covering them. Finish it off by hot gluing a big bow on your decoration, this looks nice in one corner, but would look good right in the center too. Make sure the ribbon is in a fall color.
An old rake that you won’t use again can be transformed into another door decoration. Hot glue artificial leaves, feathers, and fall grasses to the rake like a bouquet and tie it off with a big ribbon.
Old crates can be found for very cheap or even free and they look great as an outside fall decoration. Place a few of them on your porch, stacking them if you want. Then, sprinkle various sizes of pumpkins and gourds inside and on top of them for a quick porch decoration.
This blog is brought to you by rehab jobs.
Dress your Home for Fall – Part Three
Get a plate in a warm color such as red, yellow, or orange. Gold looks great for this accessory if you can find it. Hot glue artificial leaves around the edge of the plate. Make sure they overlap each other. This can be used as a candle display, as placing two or three pillar candles on it will look lovely. You can do this with a smaller plate too, and just use it to display one pillar candle.
The front door of your home is a popular place to put your Fall decorations. I’m going to do a separate blog about wreaths, but there are several cute alternatives if you aren’t into wreaths.
You can find old picture that is framed at the thrift store or at a yard sale for very cheap. Hot acorns, pinecones, and artificial berries and leaves randomly all over the picture and frame, completely covering them. Finish it off by hot gluing a big bow on your decoration, this looks nice in one corner, but would look good right in the center too. Make sure the ribbon is in a fall color.
An old rake that you won’t use again can be transformed into another door decoration. Hot glue artificial leaves, feathers, and fall grasses to the rake like a bouquet and tie it off with a big ribbon.
Old crates can be found for very cheap or even free and they look great as an outside fall decoration. Place a few of them on your porch, stacking them if you want. Then, sprinkle various sizes of pumpkins and gourds inside and on top of them for a quick porch decoration.
read more "Dress your Home for Fall – Part Three"
The front door of your home is a popular place to put your Fall decorations. I’m going to do a separate blog about wreaths, but there are several cute alternatives if you aren’t into wreaths.
You can find old picture that is framed at the thrift store or at a yard sale for very cheap. Hot acorns, pinecones, and artificial berries and leaves randomly all over the picture and frame, completely covering them. Finish it off by hot gluing a big bow on your decoration, this looks nice in one corner, but would look good right in the center too. Make sure the ribbon is in a fall color.
An old rake that you won’t use again can be transformed into another door decoration. Hot glue artificial leaves, feathers, and fall grasses to the rake like a bouquet and tie it off with a big ribbon.
Old crates can be found for very cheap or even free and they look great as an outside fall decoration. Place a few of them on your porch, stacking them if you want. Then, sprinkle various sizes of pumpkins and gourds inside and on top of them for a quick porch decoration.
This blog is brought to you by rehab jobs.
I love when she's grounded.
My stepdaughter that is. She's not grounded very often. I am not kidding when I tell you we are SO lucky with this girl. She's a GOOD, sweet, kind-hearted young lady. I hear awful stories about daughter's turning into back talking, door slamming, zip-lipped children when they hit their teens, and she's stayed so sweet and true even up to 18 years of age (most of the time -- and I know her mom has
read more "I love when she's grounded."
Dress your Home for Fall – Part Two
Adding a fall wreath to your front door will really make the outside of your home look ready for the season. There so many different types of wreaths than can be made fairly easily that I will write a separate blog to go over them.
Window boxes are great to use in the summertime, but are you taking advantage of them for fall decorating? It is easy to do, and it will get the exterior of your home looking very festive. You can be creative and use your window boxes for winter and Christmas decorating too. First, get a little bit of chicken wire and cut it to fit your window box like a lid. Staple it into place on top of the window box in a few places. The dirt that is already in the window boxes will hold your decorations in place. Get some small wooden skewers or small sticks to hold up your decorations. Gather tall fall grasses and cat tails to group together around the sticks and stick them into the dirt through the chicken wire. Once most of the window box is full, add colorful fall elements to it. If you would like to use the dirt for planting live plants, you can plant mums to decorate around or live evergreen plants. These plants will survive the winter well. Place small pumpkins and gourds around the grasses. Use your wooden skewers to hold the pumpkins and gourds in place. Pre-drill a hole where your skewer will go. After thanksgiving just remove the pumpkins and gourds and replace them with pine cones and a few lights.
read more "Dress your Home for Fall – Part Two"
Window boxes are great to use in the summertime, but are you taking advantage of them for fall decorating? It is easy to do, and it will get the exterior of your home looking very festive. You can be creative and use your window boxes for winter and Christmas decorating too. First, get a little bit of chicken wire and cut it to fit your window box like a lid. Staple it into place on top of the window box in a few places. The dirt that is already in the window boxes will hold your decorations in place. Get some small wooden skewers or small sticks to hold up your decorations. Gather tall fall grasses and cat tails to group together around the sticks and stick them into the dirt through the chicken wire. Once most of the window box is full, add colorful fall elements to it. If you would like to use the dirt for planting live plants, you can plant mums to decorate around or live evergreen plants. These plants will survive the winter well. Place small pumpkins and gourds around the grasses. Use your wooden skewers to hold the pumpkins and gourds in place. Pre-drill a hole where your skewer will go. After thanksgiving just remove the pumpkins and gourds and replace them with pine cones and a few lights.

This blog is brought to you by physician staffing.
Dress your Home for Fall – Part Two
Adding a fall wreath to your front door will really make the outside of your home look ready for the season. There so many different types of wreaths than can be made fairly easily that I will write a separate blog to go over them.
Window boxes are great to use in the summertime, but are you taking advantage of them for fall decorating? It is easy to do, and it will get the exterior of your home looking very festive. You can be creative and use your window boxes for winter and Christmas decorating too. First, get a little bit of chicken wire and cut it to fit your window box like a lid. Staple it into place on top of the window box in a few places. The dirt that is already in the window boxes will hold your decorations in place. Get some small wooden skewers or small sticks to hold up your decorations. Gather tall fall grasses and cat tails to group together around the sticks and stick them into the dirt through the chicken wire. Once most of the window box is full, add colorful fall elements to it. If you would like to use the dirt for planting live plants, you can plant mums to decorate around or live evergreen plants. These plants will survive the winter well. Place small pumpkins and gourds around the grasses. Use your wooden skewers to hold the pumpkins and gourds in place. Pre-drill a hole where your skewer will go. After thanksgiving just remove the pumpkins and gourds and replace them with pine cones and a few lights.
read more "Dress your Home for Fall – Part Two"
Window boxes are great to use in the summertime, but are you taking advantage of them for fall decorating? It is easy to do, and it will get the exterior of your home looking very festive. You can be creative and use your window boxes for winter and Christmas decorating too. First, get a little bit of chicken wire and cut it to fit your window box like a lid. Staple it into place on top of the window box in a few places. The dirt that is already in the window boxes will hold your decorations in place. Get some small wooden skewers or small sticks to hold up your decorations. Gather tall fall grasses and cat tails to group together around the sticks and stick them into the dirt through the chicken wire. Once most of the window box is full, add colorful fall elements to it. If you would like to use the dirt for planting live plants, you can plant mums to decorate around or live evergreen plants. These plants will survive the winter well. Place small pumpkins and gourds around the grasses. Use your wooden skewers to hold the pumpkins and gourds in place. Pre-drill a hole where your skewer will go. After thanksgiving just remove the pumpkins and gourds and replace them with pine cones and a few lights.
This blog is brought to you by physician staffing.
Dress your Home for Fall – Part One
Fall flower arrangements can dress your home up for Thanksgiving. Take advantage of nature. Try putting colorful corn into a glass container, filling it with water, and fill it with sunflowers, mums, and thistle. Add red berry sprigs if you can. If you have a field near your house, you can gather cattails and other dried grass. You can put all of them into a large vase without water. Hand tied bouquets look great too, they can be tied to posts outside your home or to stair railings. Make the most of pumpkins during the fall season. There are lots of centerpieces that use pumpkins, see my previous post on thanksgiving centerpieces to get some ideas.

Adding autumn accessories around the home will make it look festive for your Thanksgiving. These accessories can be made into decorations without having to spend very much money at all, and to save even more money, you can choose artificial plant elements so you can reuse these decorations year after year.
Buy or sew a table runner in a fall color. Good colors to use for fall are burgundy, dark green, orange, or yellow ochre. Maybe you will even want to make or buy a few, and alternate them. Next, buy some artificial fall leaves from a craft store. Artificial leaves are usually available in silk or velvet, velvet looks more interesting to me, because it has more variances and texture, but choose the one you prefer. Now, hot glue the leaves to the table runner in a random pattern. Try using more leaves on the ends of the runner and near the edges, leaving just a few scattered throughout the remainder of the material. Don’t be afraid to layer the leaves a little bit for a richer fuller look in some places.
read more "Dress your Home for Fall – Part One"

Adding autumn accessories around the home will make it look festive for your Thanksgiving. These accessories can be made into decorations without having to spend very much money at all, and to save even more money, you can choose artificial plant elements so you can reuse these decorations year after year.
Buy or sew a table runner in a fall color. Good colors to use for fall are burgundy, dark green, orange, or yellow ochre. Maybe you will even want to make or buy a few, and alternate them. Next, buy some artificial fall leaves from a craft store. Artificial leaves are usually available in silk or velvet, velvet looks more interesting to me, because it has more variances and texture, but choose the one you prefer. Now, hot glue the leaves to the table runner in a random pattern. Try using more leaves on the ends of the runner and near the edges, leaving just a few scattered throughout the remainder of the material. Don’t be afraid to layer the leaves a little bit for a richer fuller look in some places.
This blog is brought to you by nephrology jobs.
Dress your Home for Fall – Part One
Fall flower arrangements can dress your home up for Thanksgiving. Take advantage of nature. Try putting colorful corn into a glass container, filling it with water, and fill it with sunflowers, mums, and thistle. Add red berry sprigs if you can. If you have a field near your house, you can gather cattails and other dried grass. You can put all of them into a large vase without water. Hand tied bouquets look great too, they can be tied to posts outside your home or to stair railings. Make the most of pumpkins during the fall season. There are lots of centerpieces that use pumpkins, see my previous post on thanksgiving centerpieces to get some ideas.
Adding autumn accessories around the home will make it look festive for your Thanksgiving. These accessories can be made into decorations without having to spend very much money at all, and to save even more money, you can choose artificial plant elements so you can reuse these decorations year after year.
Buy or sew a table runner in a fall color. Good colors to use for fall are burgundy, dark green, orange, or yellow ochre. Maybe you will even want to make or buy a few, and alternate them. Next, buy some artificial fall leaves from a craft store. Artificial leaves are usually available in silk or velvet, velvet looks more interesting to me, because it has more variances and texture, but choose the one you prefer. Now, hot glue the leaves to the table runner in a random pattern. Try using more leaves on the ends of the runner and near the edges, leaving just a few scattered throughout the remainder of the material. Don’t be afraid to layer the leaves a little bit for a richer fuller look in some places.
read more "Dress your Home for Fall – Part One"
Adding autumn accessories around the home will make it look festive for your Thanksgiving. These accessories can be made into decorations without having to spend very much money at all, and to save even more money, you can choose artificial plant elements so you can reuse these decorations year after year.
Buy or sew a table runner in a fall color. Good colors to use for fall are burgundy, dark green, orange, or yellow ochre. Maybe you will even want to make or buy a few, and alternate them. Next, buy some artificial fall leaves from a craft store. Artificial leaves are usually available in silk or velvet, velvet looks more interesting to me, because it has more variances and texture, but choose the one you prefer. Now, hot glue the leaves to the table runner in a random pattern. Try using more leaves on the ends of the runner and near the edges, leaving just a few scattered throughout the remainder of the material. Don’t be afraid to layer the leaves a little bit for a richer fuller look in some places.
This blog is brought to you by nephrology jobs.
Weekend o' projects!
When the hubby is away, a Thrifty Decor Chick will play...and play I did with quite a few fun projects. When I say "fun," I know most of my friends would rather claw out their eyes than do these "fun" things, but it is heaven to me. :) Let's see...first off, I started with the retreating of the bathroom window, which you may have seen...then I moved on to trying this whatchamacallit out with my
read more "Weekend o' projects!"
Window retreatment tutorial!
So there's a window treatment in our bathroom that has been bugging me for months. (I have lots of little projects that bug me, argh!!) I store-bought this one and it has always bothered me that it was so sheer. I decided to "retreat" this window treatment -- and I took pictures to show you how to do it too!I make most of the window treatments in my home, as I've shown you here. I won't go on and
read more "Window retreatment tutorial!"
Easy to Make Fall Centerpieces – Part Two
One of my favorite centerpieces is one that ends up looking like a little pumpkin patch in the center of your table. This one could be used for a Halloween party just as easily as for Thanksgiving. Place a large pumpkin in the center of our table. Set medium and small pumpkins around it randomly. You probably will only need a couple of medium pumpkins and a few small ones, but depending on the size of your table, you may want more or less. Fill in the spaces with fall leaves. Add a few candles in between pumpkins if you want to. You can also add other thanksgiving garden items to the display if you choose, such as squash or apples.

To make a centerpiece that looks like a mini forest use small potted mini evergreen trees. You can get them as small as six inches high. Buy a few in varying sizes. Hot glue moss onto the pots for a really cute look, or if you don’t want to go to the trouble, just place the trees in matching decorative containers if you can find some that will suit. Cover the table in between the trees with fall leaves, mini pumpkins, and candles of any size.
read more "Easy to Make Fall Centerpieces – Part Two"

To make a centerpiece that looks like a mini forest use small potted mini evergreen trees. You can get them as small as six inches high. Buy a few in varying sizes. Hot glue moss onto the pots for a really cute look, or if you don’t want to go to the trouble, just place the trees in matching decorative containers if you can find some that will suit. Cover the table in between the trees with fall leaves, mini pumpkins, and candles of any size.
You can place a large pumpkin on a pedestal cake plate for a quick centerpiece. Add berries, ivy strands, moss, or fall leaves to the plate around the base of the pumpkin.
If you want to buy mum plants, ivy, or ferns you can use them for fall season decorating that will be fresh for the whole season. All you need is a large basket or other container to place the mum pots inside. Arrange a couple of ferns or ivy plant pots between the mums inside the basket. Use moss to cover the plastic rims of the pots, or drape some fall colored material between the plants.
This blog is brought to you by locum tenens.
If you want to buy mum plants, ivy, or ferns you can use them for fall season decorating that will be fresh for the whole season. All you need is a large basket or other container to place the mum pots inside. Arrange a couple of ferns or ivy plant pots between the mums inside the basket. Use moss to cover the plastic rims of the pots, or drape some fall colored material between the plants.
This blog is brought to you by locum tenens.
Easy to Make Fall Centerpieces – Part Two
One of my favorite centerpieces is one that ends up looking like a little pumpkin patch in the center of your table. This one could be used for a Halloween party just as easily as for Thanksgiving. Place a large pumpkin in the center of our table. Set medium and small pumpkins around it randomly. You probably will only need a couple of medium pumpkins and a few small ones, but depending on the size of your table, you may want more or less. Fill in the spaces with fall leaves. Add a few candles in between pumpkins if you want to. You can also add other thanksgiving garden items to the display if you choose, such as squash or apples.
To make a centerpiece that looks like a mini forest use small potted mini evergreen trees. You can get them as small as six inches high. Buy a few in varying sizes. Hot glue moss onto the pots for a really cute look, or if you don’t want to go to the trouble, just place the trees in matching decorative containers if you can find some that will suit. Cover the table in between the trees with fall leaves, mini pumpkins, and candles of any size.
read more "Easy to Make Fall Centerpieces – Part Two"
To make a centerpiece that looks like a mini forest use small potted mini evergreen trees. You can get them as small as six inches high. Buy a few in varying sizes. Hot glue moss onto the pots for a really cute look, or if you don’t want to go to the trouble, just place the trees in matching decorative containers if you can find some that will suit. Cover the table in between the trees with fall leaves, mini pumpkins, and candles of any size.
You can place a large pumpkin on a pedestal cake plate for a quick centerpiece. Add berries, ivy strands, moss, or fall leaves to the plate around the base of the pumpkin.
If you want to buy mum plants, ivy, or ferns you can use them for fall season decorating that will be fresh for the whole season. All you need is a large basket or other container to place the mum pots inside. Arrange a couple of ferns or ivy plant pots between the mums inside the basket. Use moss to cover the plastic rims of the pots, or drape some fall colored material between the plants.
This blog is brought to you by locum tenens.
If you want to buy mum plants, ivy, or ferns you can use them for fall season decorating that will be fresh for the whole season. All you need is a large basket or other container to place the mum pots inside. Arrange a couple of ferns or ivy plant pots between the mums inside the basket. Use moss to cover the plastic rims of the pots, or drape some fall colored material between the plants.
This blog is brought to you by locum tenens.
Happy Birthday to me!
First off, I must preface this post by saying, I think your birthday should be a YOU day. I strongly believe in this, especially the older I get and now that I have a child. It's the only day of the year you can do what YOU want to do without feeling the mommy guilt, wife guilt, just plain GUILT. I always take the day off and do what I want to do. Cause it's my birthday. I present to you, my
read more "Happy Birthday to me!"
Easy to Make Fall Centerpieces – Part One
If you are hosting a Thanksgiving meal at your house this year, here are some ideas to impress them with your table decorating.
A centerpiece on the table will be sure to draw attention from your guests and get you compliments. There are many options you could go with, and some of them are very fast to prepare if you are in a hurry.
A shallow glass tray filled with red cranberries topped with white tea candles can be a pretty centerpiece and it will take you less than five minutes to prepare. Since this decoration is on a tray, you can try displaying it around your home to see where it will look best.
Candlesticks and leaves can be arranged together to be a pretty centerpiece. First, arrange the candlesticks, or pillar candles, down the center of the table. This will look best if it is done on top of a narrow runner placed on the table first, in a color that will enhance the thanksgiving feeling, such as forest green, burgundy, or yellow ochre. Next, arrange fall leaves around the base of each candle. You can also add pinecones or twigs to the display if you would like. If you would rather have a portable decoration, lay fabric on a serving tray and use it for your decorating instead. This would look nice displayed on a coffee table or end table.
A green potted plant with trailing branches can be a great starting point for a centerpiece decoration. Ivy works well for this centerpiece, but other similarly shaped plants can work too. You now need a container in which to place the ivy pot. My favorite for this centerpiece is to use a hollowed out pumpkin, but a basket would work too. Fill any gap between the edge of the pot and the edge of the container with fall leaves, and scatter a few down the table on each side of the container.
read more "Easy to Make Fall Centerpieces – Part One"
A centerpiece on the table will be sure to draw attention from your guests and get you compliments. There are many options you could go with, and some of them are very fast to prepare if you are in a hurry.
A shallow glass tray filled with red cranberries topped with white tea candles can be a pretty centerpiece and it will take you less than five minutes to prepare. Since this decoration is on a tray, you can try displaying it around your home to see where it will look best.
Candlesticks and leaves can be arranged together to be a pretty centerpiece. First, arrange the candlesticks, or pillar candles, down the center of the table. This will look best if it is done on top of a narrow runner placed on the table first, in a color that will enhance the thanksgiving feeling, such as forest green, burgundy, or yellow ochre. Next, arrange fall leaves around the base of each candle. You can also add pinecones or twigs to the display if you would like. If you would rather have a portable decoration, lay fabric on a serving tray and use it for your decorating instead. This would look nice displayed on a coffee table or end table.

A green potted plant with trailing branches can be a great starting point for a centerpiece decoration. Ivy works well for this centerpiece, but other similarly shaped plants can work too. You now need a container in which to place the ivy pot. My favorite for this centerpiece is to use a hollowed out pumpkin, but a basket would work too. Fill any gap between the edge of the pot and the edge of the container with fall leaves, and scatter a few down the table on each side of the container.
This blog is brought to you by physical therapy jobs.
Easy to Make Fall Centerpieces – Part One
If you are hosting a Thanksgiving meal at your house this year, here are some ideas to impress them with your table decorating.
A centerpiece on the table will be sure to draw attention from your guests and get you compliments. There are many options you could go with, and some of them are very fast to prepare if you are in a hurry.
A shallow glass tray filled with red cranberries topped with white tea candles can be a pretty centerpiece and it will take you less than five minutes to prepare. Since this decoration is on a tray, you can try displaying it around your home to see where it will look best.
Candlesticks and leaves can be arranged together to be a pretty centerpiece. First, arrange the candlesticks, or pillar candles, down the center of the table. This will look best if it is done on top of a narrow runner placed on the table first, in a color that will enhance the thanksgiving feeling, such as forest green, burgundy, or yellow ochre. Next, arrange fall leaves around the base of each candle. You can also add pinecones or twigs to the display if you would like. If you would rather have a portable decoration, lay fabric on a serving tray and use it for your decorating instead. This would look nice displayed on a coffee table or end table.
A green potted plant with trailing branches can be a great starting point for a centerpiece decoration. Ivy works well for this centerpiece, but other similarly shaped plants can work too. You now need a container in which to place the ivy pot. My favorite for this centerpiece is to use a hollowed out pumpkin, but a basket would work too. Fill any gap between the edge of the pot and the edge of the container with fall leaves, and scatter a few down the table on each side of the container.
read more "Easy to Make Fall Centerpieces – Part One"
A centerpiece on the table will be sure to draw attention from your guests and get you compliments. There are many options you could go with, and some of them are very fast to prepare if you are in a hurry.
A shallow glass tray filled with red cranberries topped with white tea candles can be a pretty centerpiece and it will take you less than five minutes to prepare. Since this decoration is on a tray, you can try displaying it around your home to see where it will look best.
Candlesticks and leaves can be arranged together to be a pretty centerpiece. First, arrange the candlesticks, or pillar candles, down the center of the table. This will look best if it is done on top of a narrow runner placed on the table first, in a color that will enhance the thanksgiving feeling, such as forest green, burgundy, or yellow ochre. Next, arrange fall leaves around the base of each candle. You can also add pinecones or twigs to the display if you would like. If you would rather have a portable decoration, lay fabric on a serving tray and use it for your decorating instead. This would look nice displayed on a coffee table or end table.
A green potted plant with trailing branches can be a great starting point for a centerpiece decoration. Ivy works well for this centerpiece, but other similarly shaped plants can work too. You now need a container in which to place the ivy pot. My favorite for this centerpiece is to use a hollowed out pumpkin, but a basket would work too. Fill any gap between the edge of the pot and the edge of the container with fall leaves, and scatter a few down the table on each side of the container.
This blog is brought to you by physical therapy jobs.
Where I got it and how much it costs.
I've received a ton of questions on where I've purchased items in my posts, so I thought I'd list where I got everything and how much I paid. (If there's no price it just means I can't remember!) I hope this helps out -- I'll try to keep this up on future posts. Let me know if you have any more questions!Fall is here? It's 84 degrees outside! Door décor:Hanging flower containter, Southern Living
read more "Where I got it and how much it costs."
Mission: Declutter and Organize
I love to organize. Most days you wouldn't know it from the state of our home, but I blame that on the two-year-old, Hurricane Bub. I have a sickness with it, like this, but this sickness I haven't really shown you here yet.This year was the Year of Declutter in our house. I decided last December that I would scour every. single. crevice of this house and get rid of anything we didn't need and
read more "Mission: Declutter and Organize"
Make your Home Cozy for Winter – Part Four
If you have a fireplace winter is the season when you really want to use it to your advantage. Make sure your fireplace is the focal point during these cold months. Put those big floor pillows and blanket near the fireplace. Stack a few books or candles on one side of the seating area. Make sure the mantle is decorated for the season with warm accents.
Wintertime is a great time for curling up with a book and a warm mug of hot chocolate. Make sure your family room has a wonderful place to read. If there is a comfortable chair in the family room make sure there is a small table next to it and an ottoman in front of it. Drape a throw over the back of the chair and place a cozy accent pillow in the chair. Optionally, add a warm little dog or cat as seen below. If you don’t have a chair do this with, use your love seat or whatever you have available.

Put warm colored candles in groups in your bathrooms. You can place the candles on a small decorative tray so it is easy to move around.
If you have potpourri around the house make sure you replace it with warm spicy scented potpourri.
If you like baking, make sure you have glass covered cake plates and keep them stocked with cakes, cupcakes, bread, muffins and cookies throughout the winter.
Get a decorative tray and keep it displayed in the kitchen always stocked with mugs, spoons, tea bags, and hot chocolate mix.
These ideas can help you change your attitude about winter and get excited about it. You may also enjoy winter more and spring will come before you know it.
This blog is brought to you by rehab jobs.
read more "Make your Home Cozy for Winter – Part Four"
Wintertime is a great time for curling up with a book and a warm mug of hot chocolate. Make sure your family room has a wonderful place to read. If there is a comfortable chair in the family room make sure there is a small table next to it and an ottoman in front of it. Drape a throw over the back of the chair and place a cozy accent pillow in the chair. Optionally, add a warm little dog or cat as seen below. If you don’t have a chair do this with, use your love seat or whatever you have available.
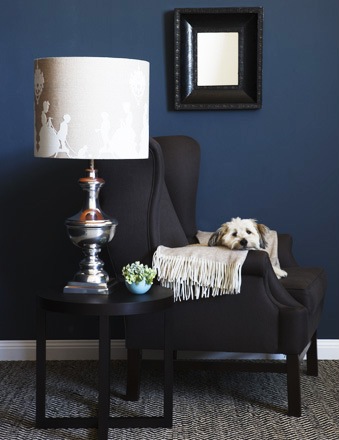
Put warm colored candles in groups in your bathrooms. You can place the candles on a small decorative tray so it is easy to move around.
If you have potpourri around the house make sure you replace it with warm spicy scented potpourri.
If you like baking, make sure you have glass covered cake plates and keep them stocked with cakes, cupcakes, bread, muffins and cookies throughout the winter.
Get a decorative tray and keep it displayed in the kitchen always stocked with mugs, spoons, tea bags, and hot chocolate mix.
These ideas can help you change your attitude about winter and get excited about it. You may also enjoy winter more and spring will come before you know it.
This blog is brought to you by rehab jobs.
Make your Home Cozy for Winter – Part Four
If you have a fireplace winter is the season when you really want to use it to your advantage. Make sure your fireplace is the focal point during these cold months. Put those big floor pillows and blanket near the fireplace. Stack a few books or candles on one side of the seating area. Make sure the mantle is decorated for the season with warm accents.
Wintertime is a great time for curling up with a book and a warm mug of hot chocolate. Make sure your family room has a wonderful place to read. If there is a comfortable chair in the family room make sure there is a small table next to it and an ottoman in front of it. Drape a throw over the back of the chair and place a cozy accent pillow in the chair. Optionally, add a warm little dog or cat as seen below. If you don’t have a chair do this with, use your love seat or whatever you have available.
Put warm colored candles in groups in your bathrooms. You can place the candles on a small decorative tray so it is easy to move around.
If you have potpourri around the house make sure you replace it with warm spicy scented potpourri.
If you like baking, make sure you have glass covered cake plates and keep them stocked with cakes, cupcakes, bread, muffins and cookies throughout the winter.
Get a decorative tray and keep it displayed in the kitchen always stocked with mugs, spoons, tea bags, and hot chocolate mix.
These ideas can help you change your attitude about winter and get excited about it. You may also enjoy winter more and spring will come before you know it.
This blog is brought to you by rehab jobs.
read more "Make your Home Cozy for Winter – Part Four"
Wintertime is a great time for curling up with a book and a warm mug of hot chocolate. Make sure your family room has a wonderful place to read. If there is a comfortable chair in the family room make sure there is a small table next to it and an ottoman in front of it. Drape a throw over the back of the chair and place a cozy accent pillow in the chair. Optionally, add a warm little dog or cat as seen below. If you don’t have a chair do this with, use your love seat or whatever you have available.
Put warm colored candles in groups in your bathrooms. You can place the candles on a small decorative tray so it is easy to move around.
If you have potpourri around the house make sure you replace it with warm spicy scented potpourri.
If you like baking, make sure you have glass covered cake plates and keep them stocked with cakes, cupcakes, bread, muffins and cookies throughout the winter.
Get a decorative tray and keep it displayed in the kitchen always stocked with mugs, spoons, tea bags, and hot chocolate mix.
These ideas can help you change your attitude about winter and get excited about it. You may also enjoy winter more and spring will come before you know it.
This blog is brought to you by rehab jobs.
Make your Home Cozy for Winter – Part Three
House plants can make the home seem cozy and help you not to miss your yard as much. Flowers in warm colored vases displayed weekly can really liven a room up. Or buy some hanging plants to put in a room.
Candles are easy to store away during the summer and give the house a nice glow and scent during the winter. An added bonus is the fact that candles are cheap. Vanilla scented candles or candles that smell like baking can make a room feel warm. I’m not a big winter person, but I do look forward to breaking out the candles when the season comes. My favorite candle scents are birthday cake and pumpkin spice.

You can put slip covers over the seat pillows of a chair or couch for winter. Make sure you get slipcovers in a warm cozy color, such as dark brown, orange, or red. Also, look for slip covers in comfortable textures, like microfiber for example.
If you have kids yourself or have children visiting your home often, think about getting a few big floor pillows that match the accent pillows on your couch, in warm colors of course. Fold a blanket or throw and put it near the pillows, this will be enough for a kid to have a great place for reading or drawing.
Glass surfaces make a room look colder. If there are a lot of glass surfaces in your home think about decorating them with fabric place mats, or wicker baskets containing seasonal decorations. Framed pictures and candles would also help make a glass table look warmer.
This blog is brought to you by physician staffing.
read more "Make your Home Cozy for Winter – Part Three"
Candles are easy to store away during the summer and give the house a nice glow and scent during the winter. An added bonus is the fact that candles are cheap. Vanilla scented candles or candles that smell like baking can make a room feel warm. I’m not a big winter person, but I do look forward to breaking out the candles when the season comes. My favorite candle scents are birthday cake and pumpkin spice.
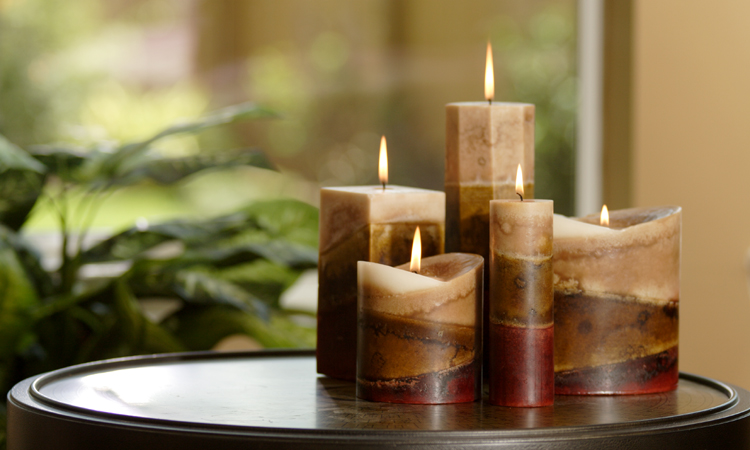
You can put slip covers over the seat pillows of a chair or couch for winter. Make sure you get slipcovers in a warm cozy color, such as dark brown, orange, or red. Also, look for slip covers in comfortable textures, like microfiber for example.
If you have kids yourself or have children visiting your home often, think about getting a few big floor pillows that match the accent pillows on your couch, in warm colors of course. Fold a blanket or throw and put it near the pillows, this will be enough for a kid to have a great place for reading or drawing.
Glass surfaces make a room look colder. If there are a lot of glass surfaces in your home think about decorating them with fabric place mats, or wicker baskets containing seasonal decorations. Framed pictures and candles would also help make a glass table look warmer.
This blog is brought to you by physician staffing.
Make your Home Cozy for Winter – Part Three
House plants can make the home seem cozy and help you not to miss your yard as much. Flowers in warm colored vases displayed weekly can really liven a room up. Or buy some hanging plants to put in a room.
Candles are easy to store away during the summer and give the house a nice glow and scent during the winter. An added bonus is the fact that candles are cheap. Vanilla scented candles or candles that smell like baking can make a room feel warm. I’m not a big winter person, but I do look forward to breaking out the candles when the season comes. My favorite candle scents are birthday cake and pumpkin spice.
You can put slip covers over the seat pillows of a chair or couch for winter. Make sure you get slipcovers in a warm cozy color, such as dark brown, orange, or red. Also, look for slip covers in comfortable textures, like microfiber for example.
If you have kids yourself or have children visiting your home often, think about getting a few big floor pillows that match the accent pillows on your couch, in warm colors of course. Fold a blanket or throw and put it near the pillows, this will be enough for a kid to have a great place for reading or drawing.
Glass surfaces make a room look colder. If there are a lot of glass surfaces in your home think about decorating them with fabric place mats, or wicker baskets containing seasonal decorations. Framed pictures and candles would also help make a glass table look warmer.
This blog is brought to you by physician staffing.
read more "Make your Home Cozy for Winter – Part Three"
Candles are easy to store away during the summer and give the house a nice glow and scent during the winter. An added bonus is the fact that candles are cheap. Vanilla scented candles or candles that smell like baking can make a room feel warm. I’m not a big winter person, but I do look forward to breaking out the candles when the season comes. My favorite candle scents are birthday cake and pumpkin spice.
You can put slip covers over the seat pillows of a chair or couch for winter. Make sure you get slipcovers in a warm cozy color, such as dark brown, orange, or red. Also, look for slip covers in comfortable textures, like microfiber for example.
If you have kids yourself or have children visiting your home often, think about getting a few big floor pillows that match the accent pillows on your couch, in warm colors of course. Fold a blanket or throw and put it near the pillows, this will be enough for a kid to have a great place for reading or drawing.
Glass surfaces make a room look colder. If there are a lot of glass surfaces in your home think about decorating them with fabric place mats, or wicker baskets containing seasonal decorations. Framed pictures and candles would also help make a glass table look warmer.
This blog is brought to you by physician staffing.
I spent $50 to save $12! Wait...
Doesn't make sense to you? Me either. Started with the $6 pumpkins at the grocery store. Had them in my cart, and thought, wow, $12 for two pumpkins I will throw away! I should just go spend the $40 on the fake pumpkins!! That way they'll pay for themselves in, say, FOUR YEARS?? See my reasoning here? My husband doesn't always get it either, bless his heart. So off to Hobby Lobby I go, get my
read more "I spent $50 to save $12! Wait..."
I feel like I just got named Homecoming Queen! Sniff!
And I'm riding around on the back of the convertible, flowers in hand...tissue dabbing a tear...(and I was shafted on Homecoming Court THREE YEARS in a ROW so don't think I never had that image in my mind!) But I'm not bitter. I digress...You all are the BEST and I am so happy to have so many new visitors! I am so completely honored that Kim featured me and feel so fortunate to have you all
read more "I feel like I just got named Homecoming Queen! Sniff!"
Apples, Pumpkins and Marching Band
That is what fall means to me. Apples because I can't get enough apple pie, cider, crisp, whatever, during the season. Pumpkins because of the pie (see a trend?) and, come on, they are pumpkins! And marching band because my hubby is a marching band director and for the past 16 years of my life (including when I was in the band), each fall has meant a competition every weekend. I love all of it.
read more "Apples, Pumpkins and Marching Band"
I love nap time. ;)
My most favorite thing to do is to spend time with my Bub, but boy, do I love naptime. Look at what I got done today! Yippee!Found these at the Dollar Store:Touched them up with some white paint:Stuck a dowel in them and they're done! I'm getting more tomorrow, the whole lawn will be covered with them! :)Got an extra frame? Scrapbook paper? Here you go, with a Spooooky sparkly from Hobby Lobby
read more "I love nap time. ;)"
Make your Home Cozy for Winter – Part Two
A more permanent change you can make to warm up your home is to repaint. Unless you have a lot of time on your hands you probably don’t want to have to paint seasonally, so this is really only an option if you think you might like a warm color scheme for at least a couple of years. Warm earthy tones can really make a room feel warmer. Orange is my personal favorite warm color, I love it because there are lots of shades to choose from so you can make a room look modern and bright, or elegant and subdued with orange. If you have a south facing room that never sees the sun or a basement room with tiny windows, try painting an accent wall in a bright or warm hue. This can really warm the room up.
If you aren’t planning to repaint the walls, try buying accent pieces in warm colors to decorate your home. Couch pillows are easy accent pieces to use. Also try buying vases or photo frames to go with your winter décor. Throw blankets are another easy accent piece you can get in a warm color. Buy thicker throws for winter, and lighter (both and color and in weight) throws for summer.

Tiled floors or wooden floors can seem a little cold during the winter. It is easy to buy a few thick warm colored rugs to use on these floors while it is cold. Rugs are easy to store away during the summer. Look for rugs with red, orange, or brown color schemes to really warm up the room.
Check back Monday for part three of this blog.
This blog is brought to you by dialysis jobs.
read more "Make your Home Cozy for Winter – Part Two"
If you aren’t planning to repaint the walls, try buying accent pieces in warm colors to decorate your home. Couch pillows are easy accent pieces to use. Also try buying vases or photo frames to go with your winter décor. Throw blankets are another easy accent piece you can get in a warm color. Buy thicker throws for winter, and lighter (both and color and in weight) throws for summer.

Tiled floors or wooden floors can seem a little cold during the winter. It is easy to buy a few thick warm colored rugs to use on these floors while it is cold. Rugs are easy to store away during the summer. Look for rugs with red, orange, or brown color schemes to really warm up the room.
Check back Monday for part three of this blog.
This blog is brought to you by dialysis jobs.
Make your Home Cozy for Winter – Part Two
A more permanent change you can make to warm up your home is to repaint. Unless you have a lot of time on your hands you probably don’t want to have to paint seasonally, so this is really only an option if you think you might like a warm color scheme for at least a couple of years. Warm earthy tones can really make a room feel warmer. Orange is my personal favorite warm color, I love it because there are lots of shades to choose from so you can make a room look modern and bright, or elegant and subdued with orange. If you have a south facing room that never sees the sun or a basement room with tiny windows, try painting an accent wall in a bright or warm hue. This can really warm the room up.
If you aren’t planning to repaint the walls, try buying accent pieces in warm colors to decorate your home. Couch pillows are easy accent pieces to use. Also try buying vases or photo frames to go with your winter décor. Throw blankets are another easy accent piece you can get in a warm color. Buy thicker throws for winter, and lighter (both and color and in weight) throws for summer.
Tiled floors or wooden floors can seem a little cold during the winter. It is easy to buy a few thick warm colored rugs to use on these floors while it is cold. Rugs are easy to store away during the summer. Look for rugs with red, orange, or brown color schemes to really warm up the room.
Check back Monday for part three of this blog.
This blog is brought to you by dialysis jobs.
read more "Make your Home Cozy for Winter – Part Two"
If you aren’t planning to repaint the walls, try buying accent pieces in warm colors to decorate your home. Couch pillows are easy accent pieces to use. Also try buying vases or photo frames to go with your winter décor. Throw blankets are another easy accent piece you can get in a warm color. Buy thicker throws for winter, and lighter (both and color and in weight) throws for summer.
Tiled floors or wooden floors can seem a little cold during the winter. It is easy to buy a few thick warm colored rugs to use on these floors while it is cold. Rugs are easy to store away during the summer. Look for rugs with red, orange, or brown color schemes to really warm up the room.
Check back Monday for part three of this blog.
This blog is brought to you by dialysis jobs.
More Halloween treats!
Isn't he cute? :) Here's another project I finished up last night, inspired by Joy over here. (She does amazing projects, check her out!)I started with this loot:I cut, glittered, taped and stickered till I got this...This was a nice surprise -- I was going to make this:But when I unpacked Halloween stuff, I found this (I bought it last year on clearance):Don't you love when that happens?! I
read more "More Halloween treats!"
Bwwuuaahaaahaaaaaa!!
Oooohhhh aren't they SO spooooky???? Hee! Too stinkin' cute to be scary, I think. I love my cheesecloth ghosts...this is SUCH an easy project! I warn you though -- it is extremely messy.I did these last year so I don't have step-by-step pictures, but the basic ingredients are glue, warm water, balloons and felt for the faces. To make them:Blow up a few balloons in various sizes.Mix equal parts
read more "Bwwuuaahaaahaaaaaa!!"
Make your Home Cozy for Winter – Part One
With winter on the horizon now is a good time to think about making your home cozy for the cold season. Most people spend a lot more time cooped up in the house during the winter, so it is worthwhile to make the house inviting and comfortable. Many of these changes can be done by investing in winter items for the home that can be swapped with summer items each year. This way you only have to spend the extra money once, and you’re set for many years to come.
Windows look great covered with sheer curtains during the summer, but in the winter it looks best to exchange these for thicker curtains. Full length curtains that touch the floor help stop drafts from entering your home. Velvet and corduroy are both wonderful fabrics to use for curtains in the winter season. But, any thicker fabric will do, or you can try layering fabrics to achieve a more feminine look.

Bedding for winter is probably the most important detail. Make sure you own a soft fluffy comforter. Ideally, buy a down comforter and a duvet to cover it. Duvets are great because you can use them without the comforter inside during the summer, or with a much thinner comforter at least. Also, duvets usually come with pillow shams so your bedding will all match. Extra pillows on the bed can make your bed seem cozier for winter too.
Check back tomorrow for part two of this blog.
This blog is brought to you by rehab jobs.
read more "Make your Home Cozy for Winter – Part One"
Windows look great covered with sheer curtains during the summer, but in the winter it looks best to exchange these for thicker curtains. Full length curtains that touch the floor help stop drafts from entering your home. Velvet and corduroy are both wonderful fabrics to use for curtains in the winter season. But, any thicker fabric will do, or you can try layering fabrics to achieve a more feminine look.

Bedding for winter is probably the most important detail. Make sure you own a soft fluffy comforter. Ideally, buy a down comforter and a duvet to cover it. Duvets are great because you can use them without the comforter inside during the summer, or with a much thinner comforter at least. Also, duvets usually come with pillow shams so your bedding will all match. Extra pillows on the bed can make your bed seem cozier for winter too.
Check back tomorrow for part two of this blog.
This blog is brought to you by rehab jobs.
Make your Home Cozy for Winter – Part One
With winter on the horizon now is a good time to think about making your home cozy for the cold season. Most people spend a lot more time cooped up in the house during the winter, so it is worthwhile to make the house inviting and comfortable. Many of these changes can be done by investing in winter items for the home that can be swapped with summer items each year. This way you only have to spend the extra money once, and you’re set for many years to come.
Windows look great covered with sheer curtains during the summer, but in the winter it looks best to exchange these for thicker curtains. Full length curtains that touch the floor help stop drafts from entering your home. Velvet and corduroy are both wonderful fabrics to use for curtains in the winter season. But, any thicker fabric will do, or you can try layering fabrics to achieve a more feminine look.
Bedding for winter is probably the most important detail. Make sure you own a soft fluffy comforter. Ideally, buy a down comforter and a duvet to cover it. Duvets are great because you can use them without the comforter inside during the summer, or with a much thinner comforter at least. Also, duvets usually come with pillow shams so your bedding will all match. Extra pillows on the bed can make your bed seem cozier for winter too.
Check back tomorrow for part two of this blog.
This blog is brought to you by rehab jobs.
read more "Make your Home Cozy for Winter – Part One"
Windows look great covered with sheer curtains during the summer, but in the winter it looks best to exchange these for thicker curtains. Full length curtains that touch the floor help stop drafts from entering your home. Velvet and corduroy are both wonderful fabrics to use for curtains in the winter season. But, any thicker fabric will do, or you can try layering fabrics to achieve a more feminine look.
Bedding for winter is probably the most important detail. Make sure you own a soft fluffy comforter. Ideally, buy a down comforter and a duvet to cover it. Duvets are great because you can use them without the comforter inside during the summer, or with a much thinner comforter at least. Also, duvets usually come with pillow shams so your bedding will all match. Extra pillows on the bed can make your bed seem cozier for winter too.
Check back tomorrow for part two of this blog.
This blog is brought to you by rehab jobs.